G2 Quick Start Guide
Recommended Reading
Boot your robot
-
Install the batteries on both sides of robot’s chassis.
-
Click the ⏻ button at the rear of the robot’s chassis to power on the robot; the switch will light up once it is powered on.
-
Press the ⏻ button on the robot’s waist to turn on the robot.
Shutdown Procedure
-
Press and hold the ⏻ button on the robot’s waist for 5 seconds, then release it. The robot will begin the shutdown process and automatically turn off after a short while.
-
Press the ⏻ button once at the rear of the robot’s chassis to turn the batteries off.
Connect to the pad
Depending on whether the pad is mounted on the robot, the robot automatically switches between wired and wireless connections.
Wired Connection
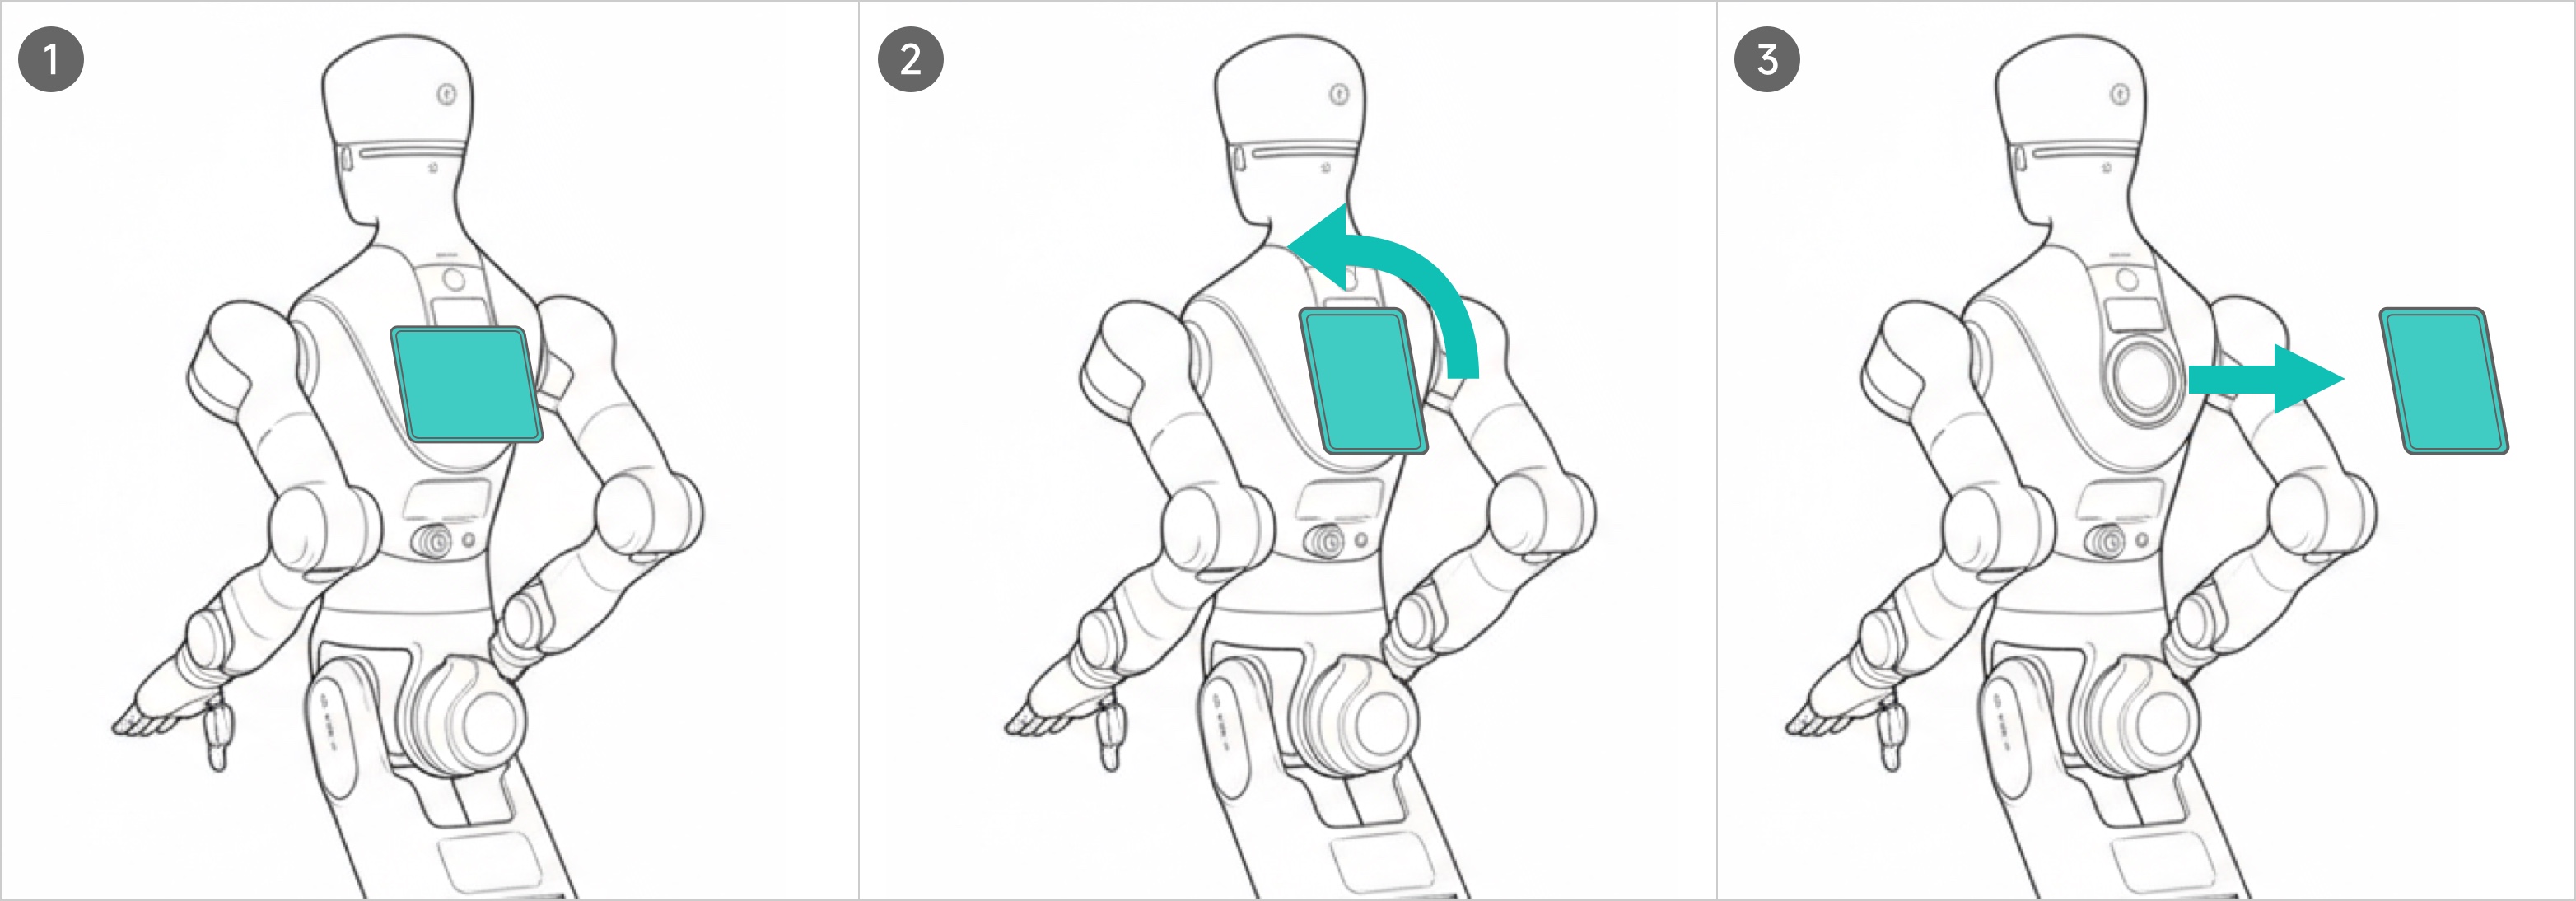
When the pad is mounted on the robot, the connection is wired, and the robot charges the pad at the same time.
Wireless Connection
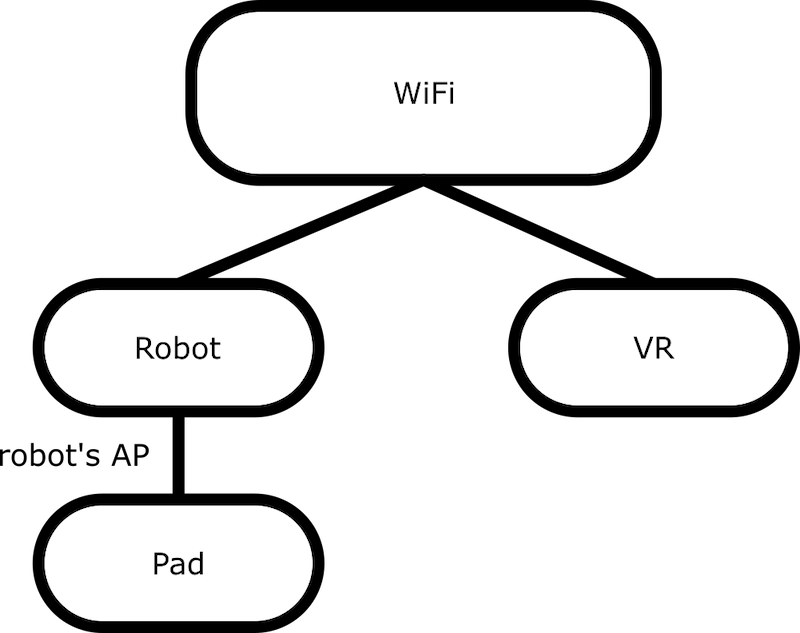
When the pad is removed, the connection automatically switches to wireless, and the robot connects to the pad via its own hotspot. You can find the SSID start with G2AP_SN to connect the pad to the robot.
🛜 How to set the networks
-
Pad Network: Swipe down from the top of the screen to open ⚙️ Settings and configure your tablet’s Wi-Fi connection 🛜.
-
Robot Network: Go to the homepage of pad, find ⚙️ on the button pannel, and you can config it under 🛜.
HINT: Tap the connected network to check the robot’s IP Address.
- VR Network: Go to the application center, find ⚙️ app, and you can config it under 🛜.
Joint Control
Go to Joint Control on the dock
Step Size and Speed
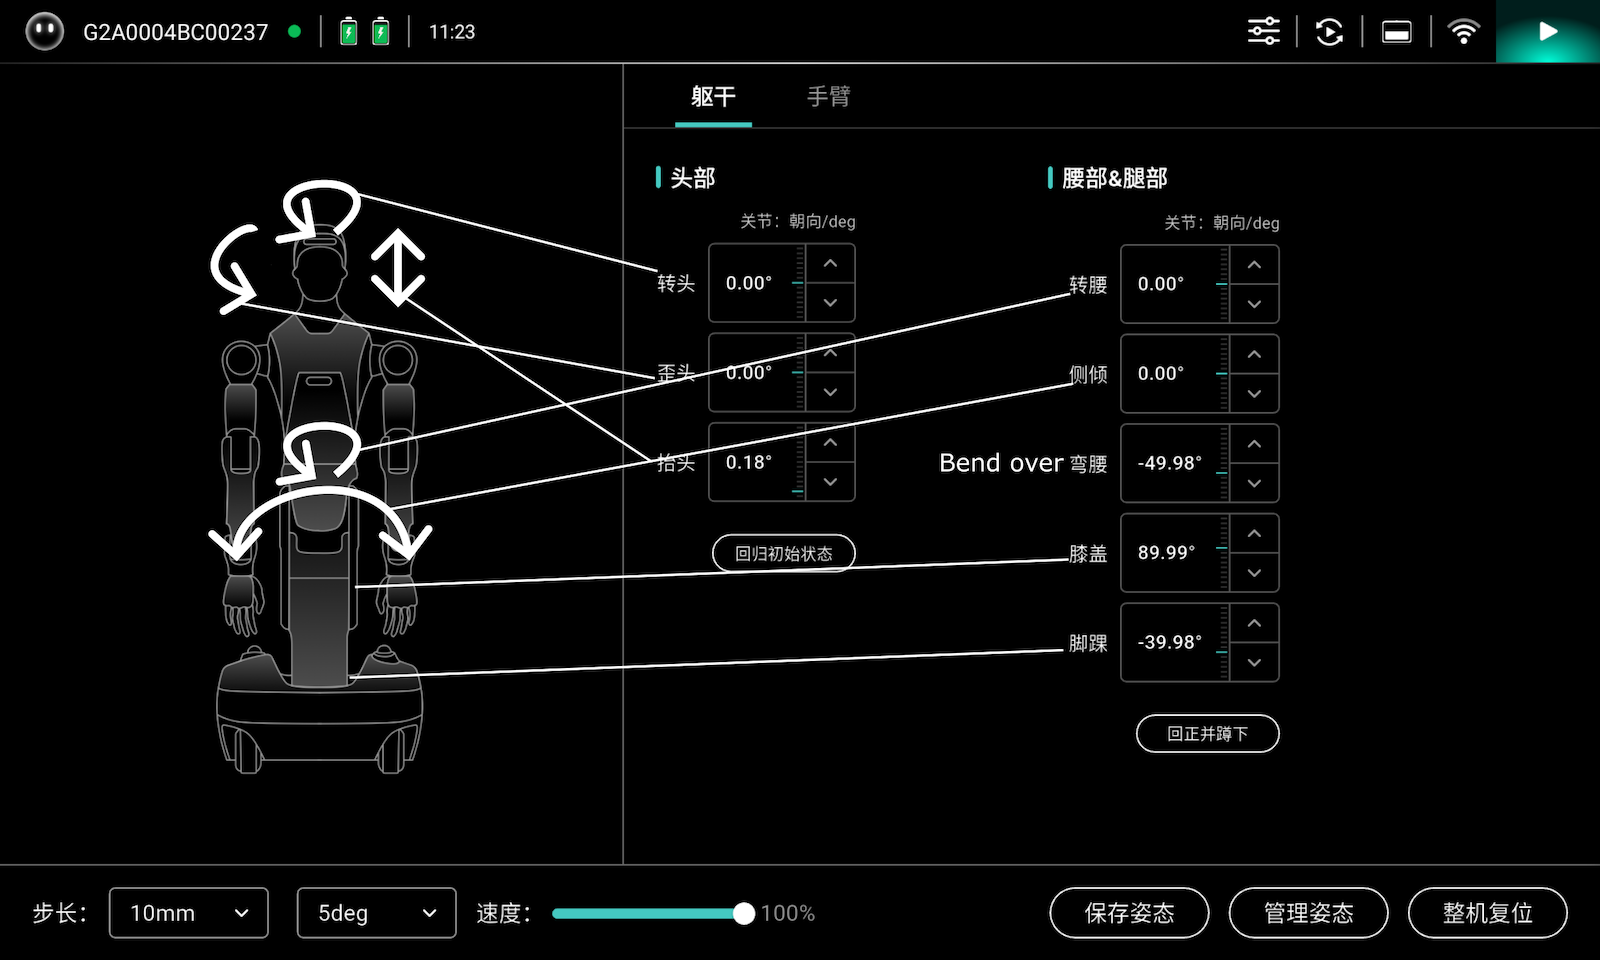
Click the “Step Size” setting at the bottom of the interface to adjust the movement step size of the robot during jog control. Drag the slider at the bottom of the interface to adjust the speed of the robot in remote control mode.
Jogging & Continuous Control
Jog Control: Tap the ⬆⬇ beside each joint for each joint of a single robot or the end position.
Continuous Control: Long press the ⬆⬇ control buttons for each joint of the robot or the end position. The corresponding joint or end will move continuously until the user releases the control button.
Head and Trunk Control
Arm control
Swap to the right of the above page, you will find the arm control. The control logic is same with head and trunk control. The joints are labelled with L(left)/R(right),
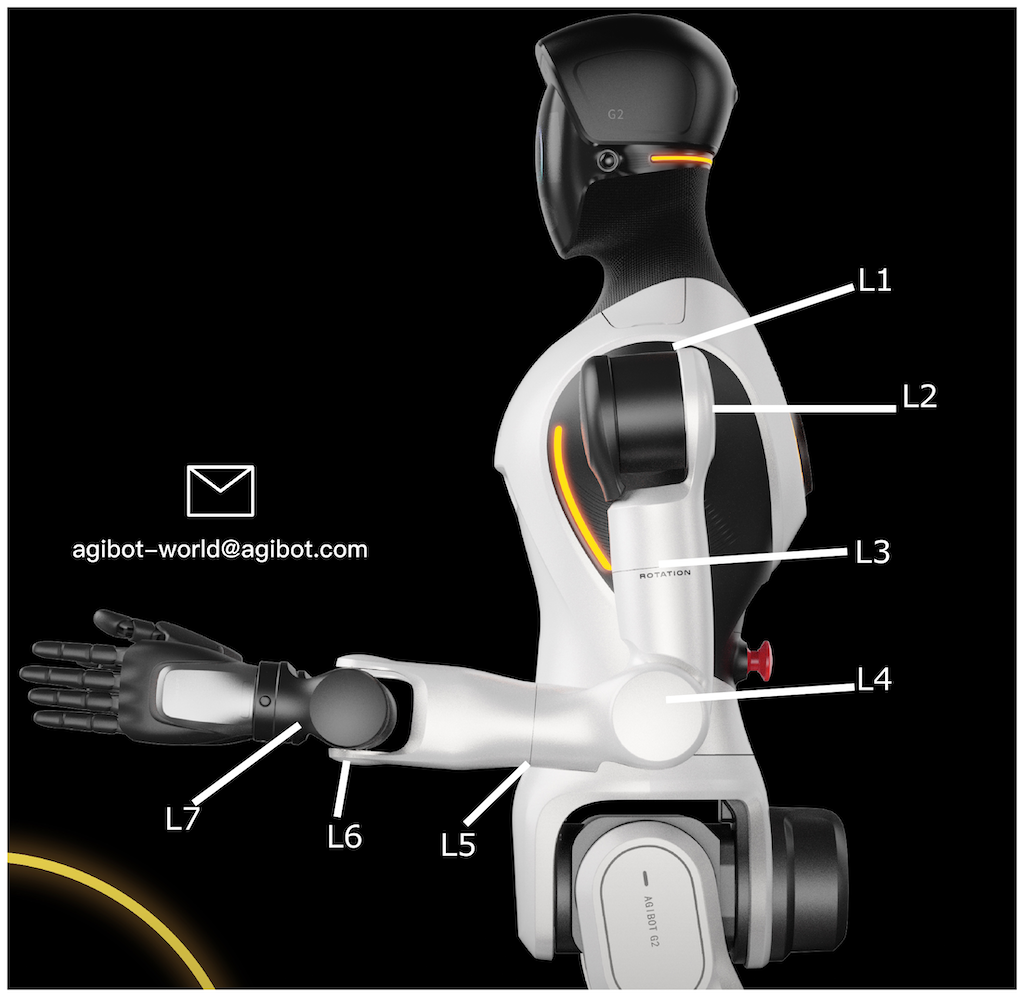
Manage posture
Look for the three buttons in the lower-right corner of the joint control app. From left to right, they are “Save Pose,” “Manage Poses,” and “Restore.” With just one tap, you can restore the robot’s pose to a previously saved one.

Mapping
Open this app on the Map APP
Create a map
- If you haven’t created any maps yet, tap the “Create Map” button to create a new map.
- Use the virtual joystick in the lower-left corner of the screen to control the robot as it moves around and completes the map.
- Tap Save on the top-right to save the map.
Edit the map
Tap the “Map Management” button to open the map management interface. Then tap the “Edit” button to open the map editing interface. You can also find “Layers” button to adjust the map’s display content.
Reposition
If the robot loses its position or if you determine that its position is incorrect, you can click the “Reposition” button to reposition it.
- Click the “Reposition” button, and an orange real-time radar point cloud will appear on the map.
- Drag the robot to move it, and rotate the slider to turn it. Continue until the orange radar point cloud aligns with the red map boundary.
- Click “Finish” to complete the relocation.
Edit Waypoints
- There are two types of waypoints: regular waypoints and charging stations. Select them from the drop-down menu on the left.
- Waypoints can be created in two ways: by drawing them manually or by recording a route.
- In manual drawing mode, tap directly on the map to create a new waypoint. Drag to adjust the position, and swipe the blue dot to adjust the direction.
- In recording mode, the app records the robot’s current position and orientation on the map.
- Tap a waypoint in the list to select it; the corresponding waypoint on the map on the right will be highlighted in blue. However, it will not be in edit mode.
- Tap the three dots to the right of a waypoint’s name to edit, rename, or delete it.
Edit Virtual Walls
- On the Virtual Walls page, tap repeatedly on the map to create virtual walls.
- Tap to select a waypoint from the list; the corresponding waypoint on the map on the right will be highlighted in blue. However, it will not be in edit mode.
- Tap the three dots to the right of a waypoint’s name to edit, rename, or delete it.
Edit Area
- On the Area page, tap repeatedly on the map to create a polygon area.
- Tap an area in the selection list; the corresponding area on the map on the right will be highlighted in blue. However, it is not in edit mode.
- Tap the three dots to the right of a waypoint’s name to edit, rename, or delete it.
Navigate
- On the map screen, tap an empty area on the map to display the “Navigate to this location” button.
- Tap the “Navigate to this location” button, and the robot will navigate to that location on its own.
- Alternatively, you can tap an existing waypoint on the map to have the robot navigate to that waypoint.
Not supported yet
- Create a Navigation Task
- Base Map Editing
Remote Controll Walking
Go to 🎮 Remote Controll Walking on the dock
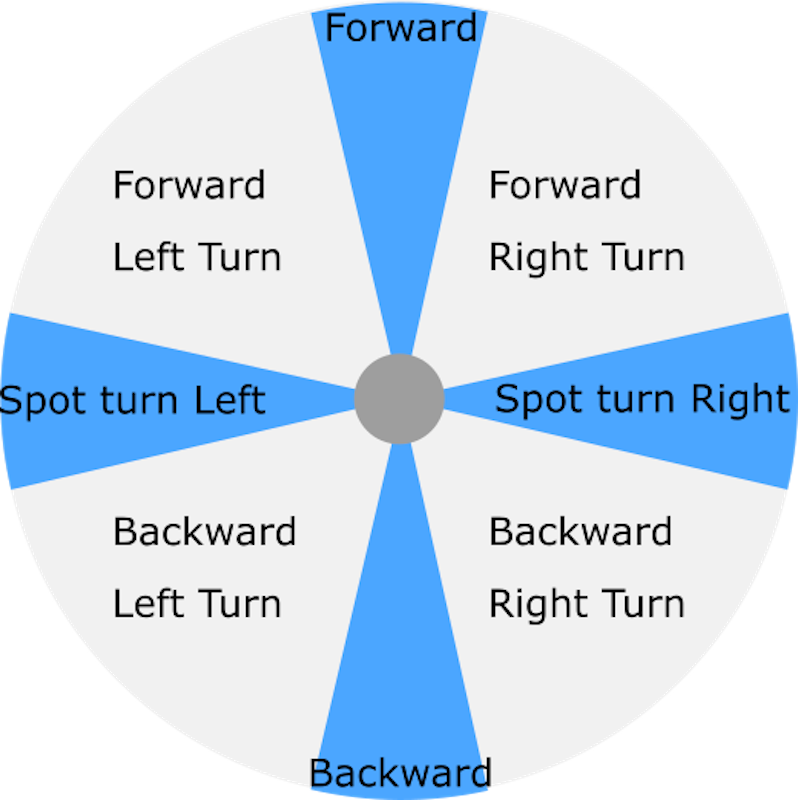
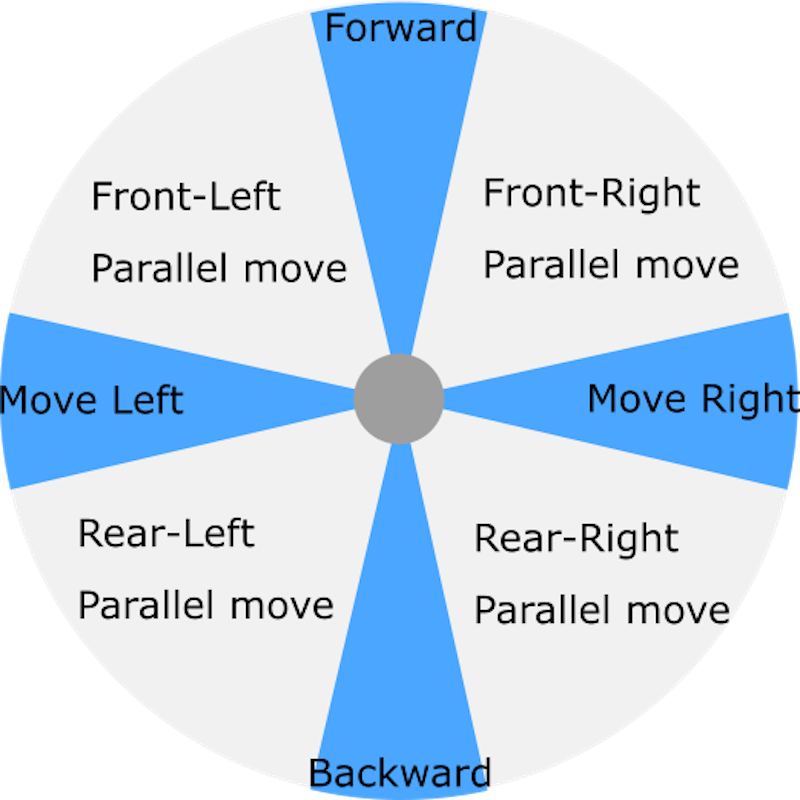
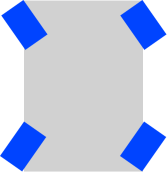
Teleoperation
Please kindly refer to this site.
Developer Tools
-
Online GDK support (Chinese): https://support.agibot.com/
-
On Robot GDK support👍: http://10.42.1.101:8849/site (Connect your development PC with G2 via Ethernet cable.)
Since you need to download the Development Kit from the robot, it’s recommended to connect with your robot via Ethernet cable. Don’t forget to adjust the IP Address of your development PC.
Read Next
Products
X2 Quick Start Guide