Quick Start Guide
Recommended Reading
We use AIM Master: Download page to control multiple robots simultaneously.
Software setup
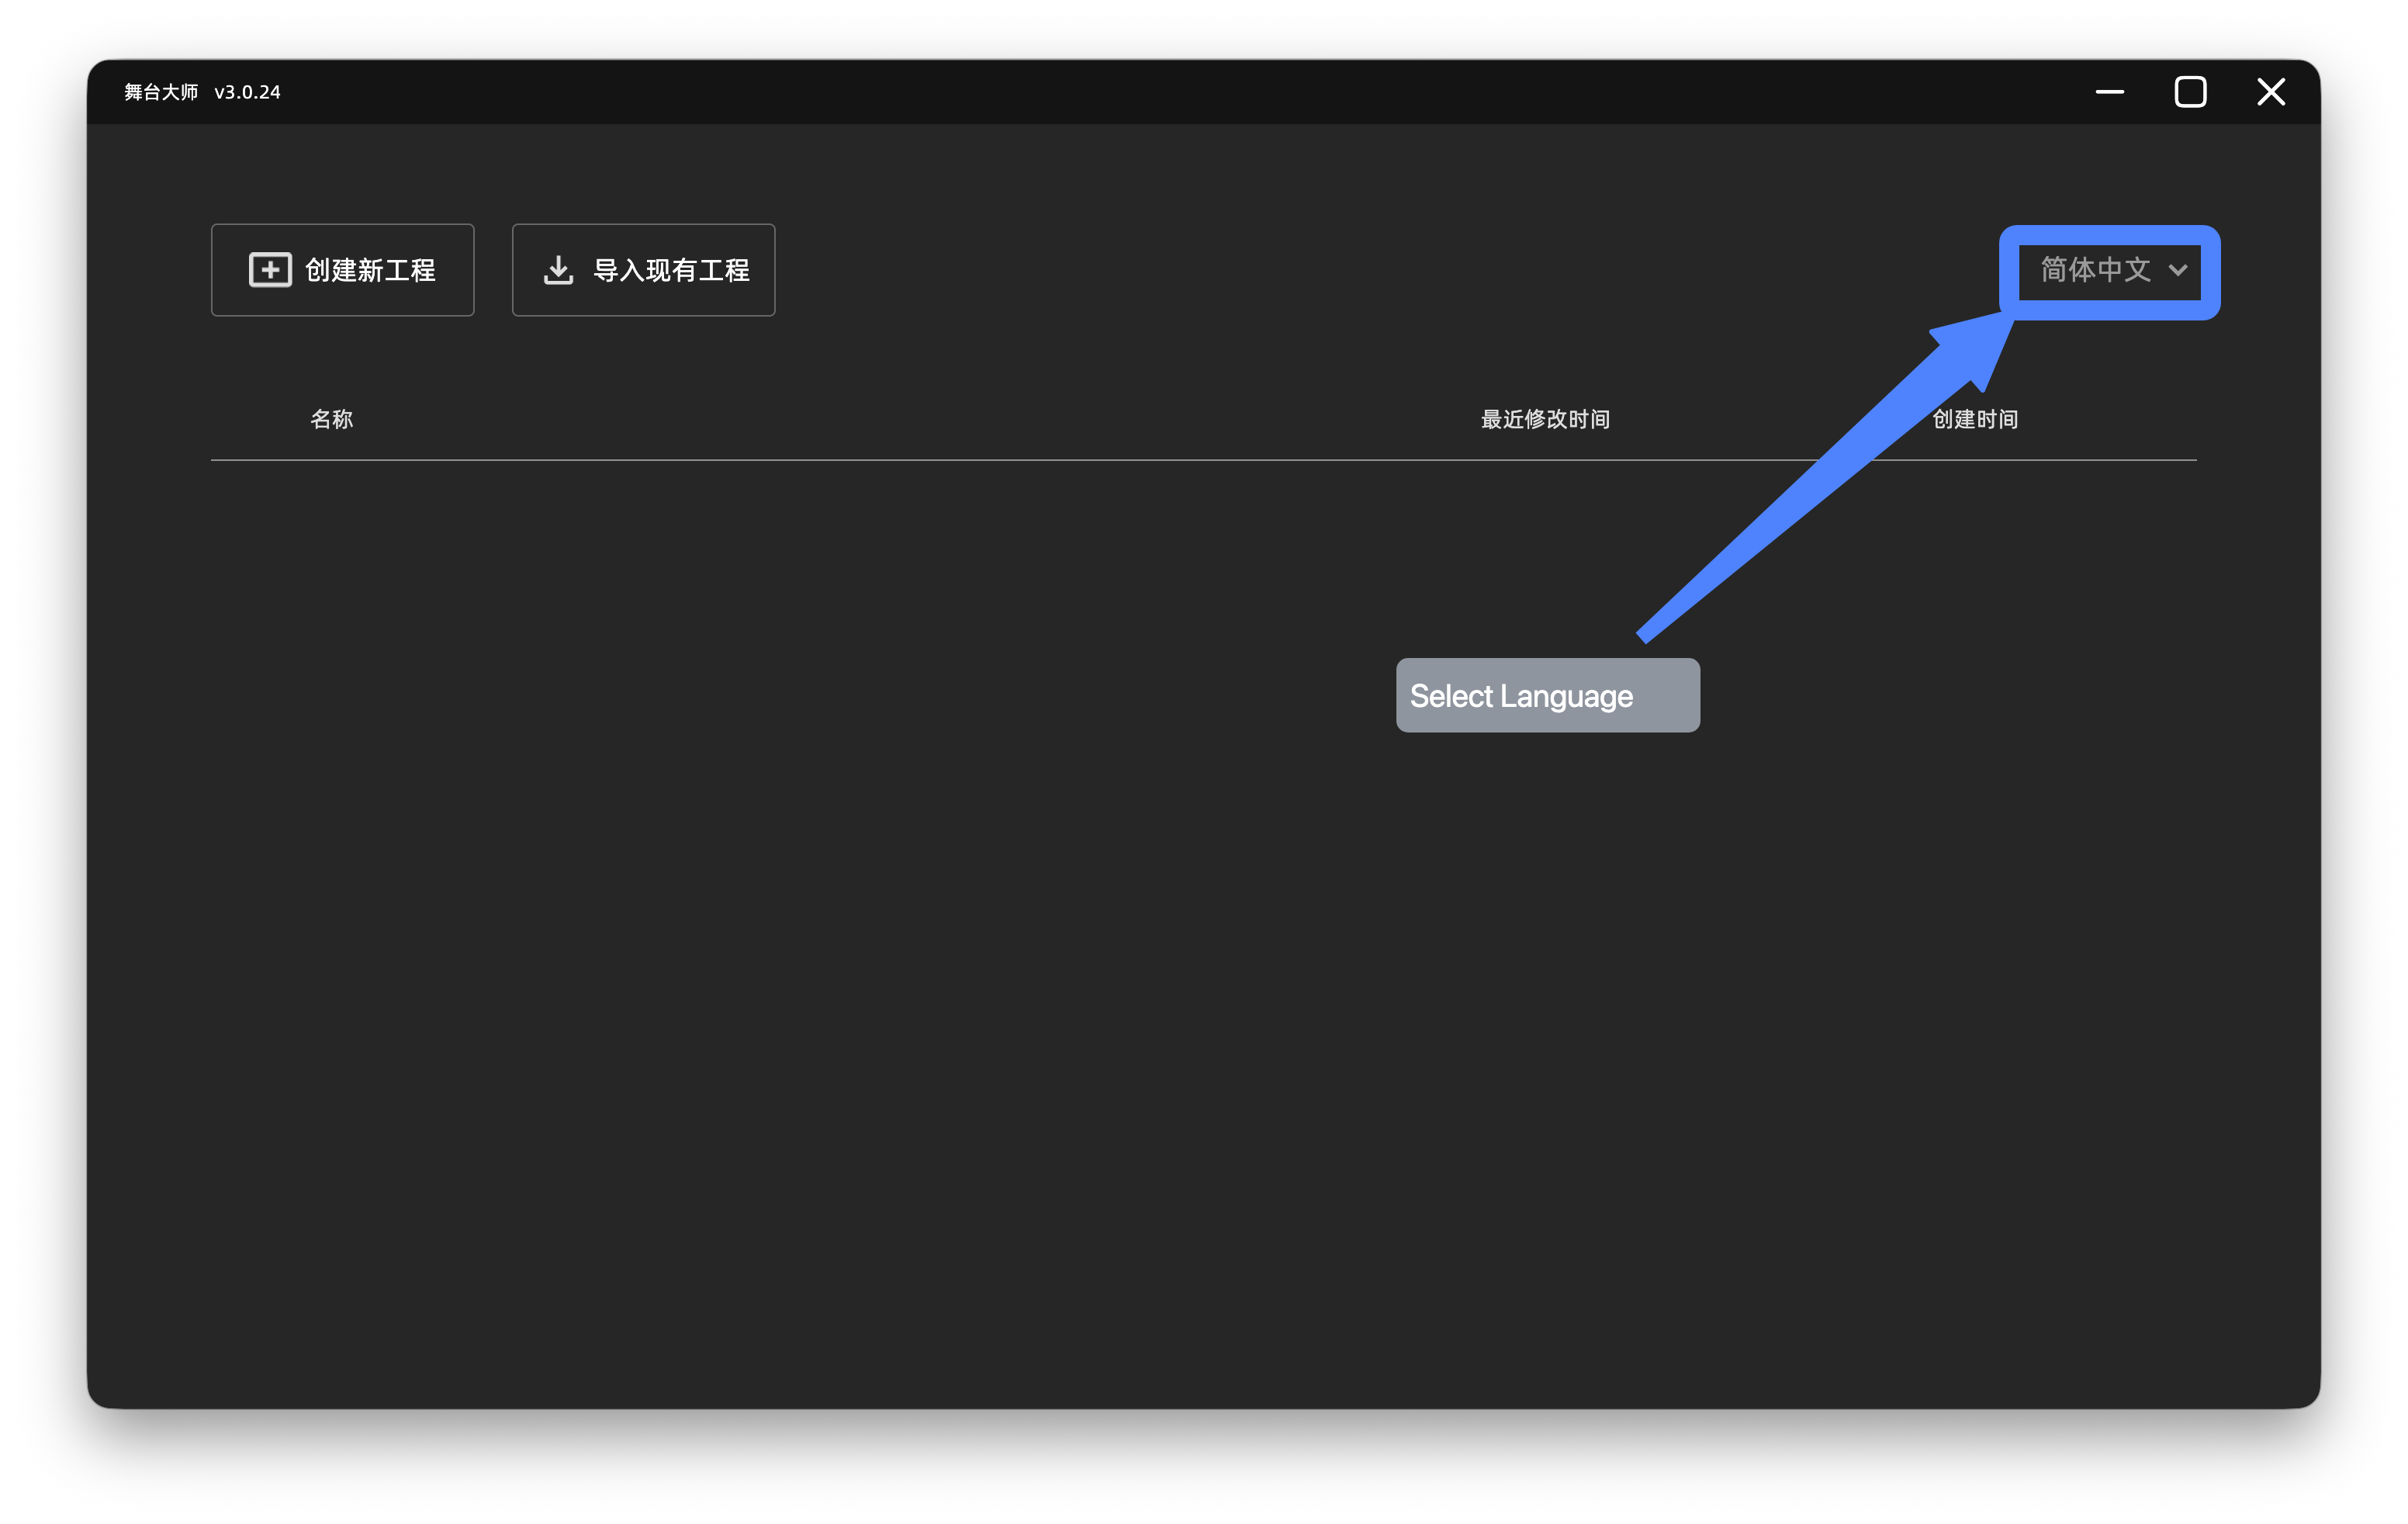
Click Create to create a new project.
Add robots
Find the robot IP
The robot must be connected to a Wi-Fi network. After connecting, check the robot’s IP address in the Agibot Go mobile app. Here is a brief guide.
Add the robot to the project
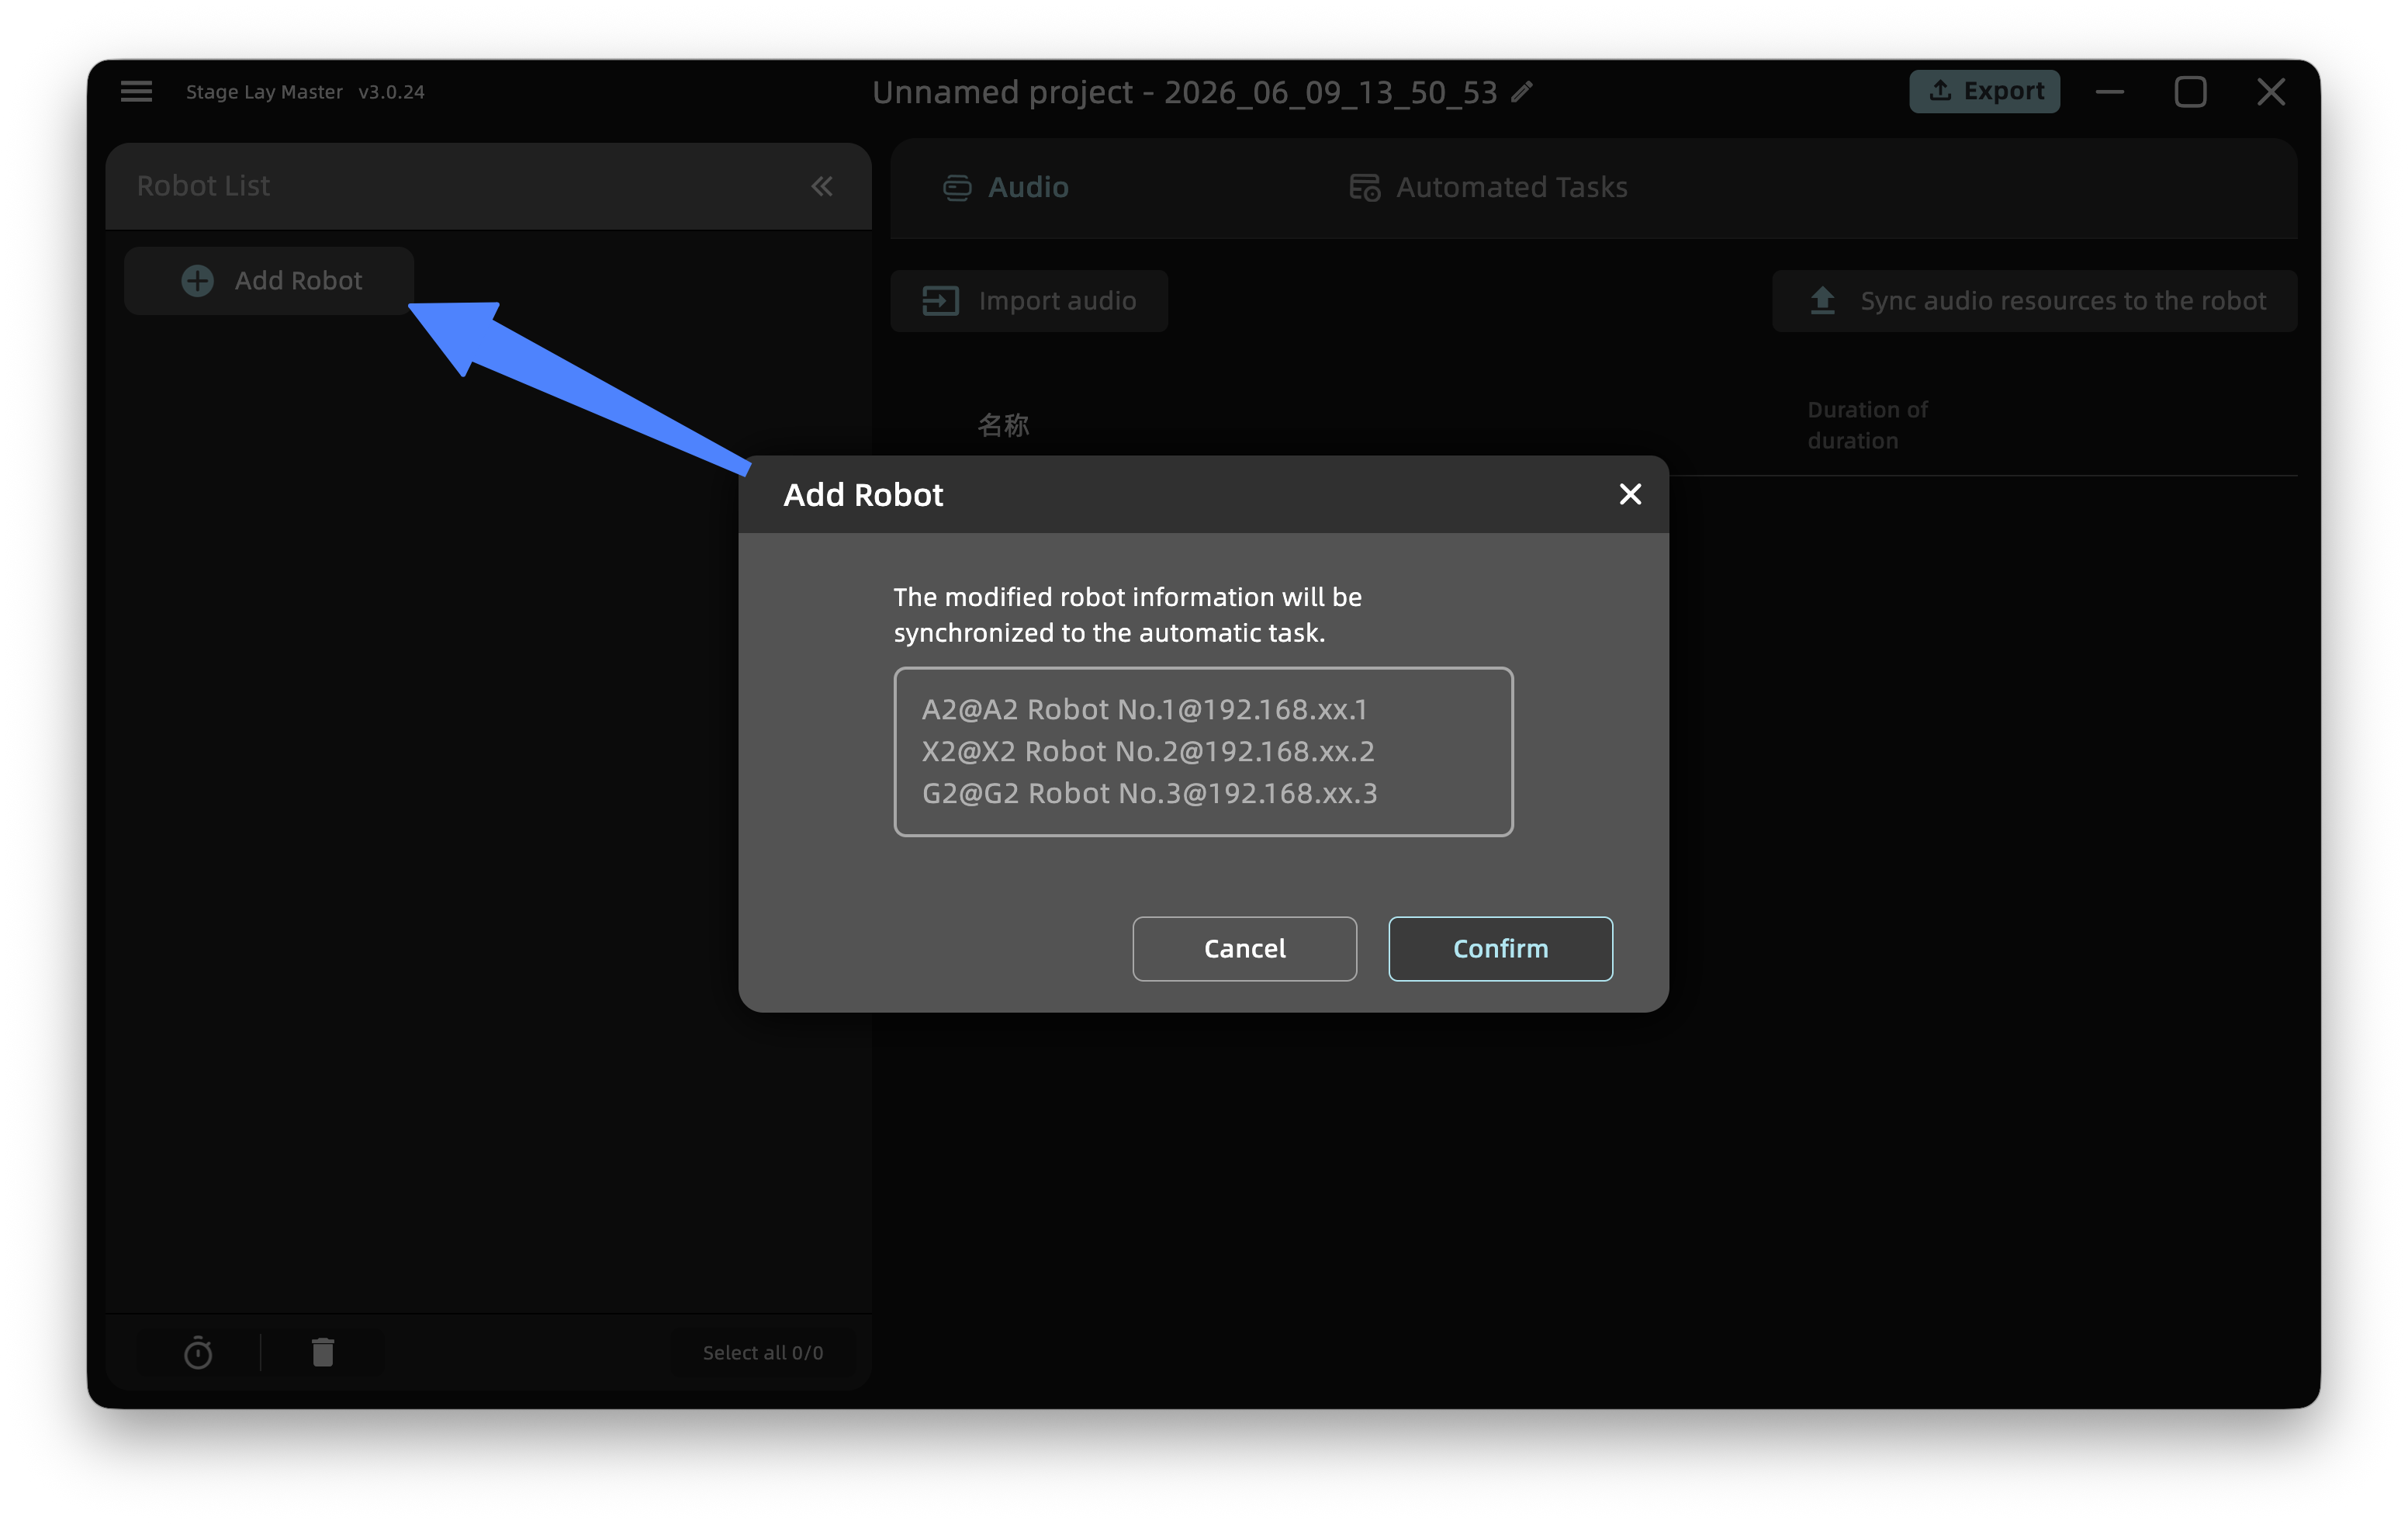
Enter a string in the format shown below to add the robot to the project.
⚠️ Important: The entry format must start with a capital X2. If entered as lowercase x2, it will be recognized as A2.
{Model}@{Name}@{Ip Address}
For example:
A2@A2 Robot@192.168.xxx.xxx
X2@X2 Robot@192.168.xxx.xxx
G2@G2 Robot@192.168.xxx.xxx
Click Confirm to add the robots.
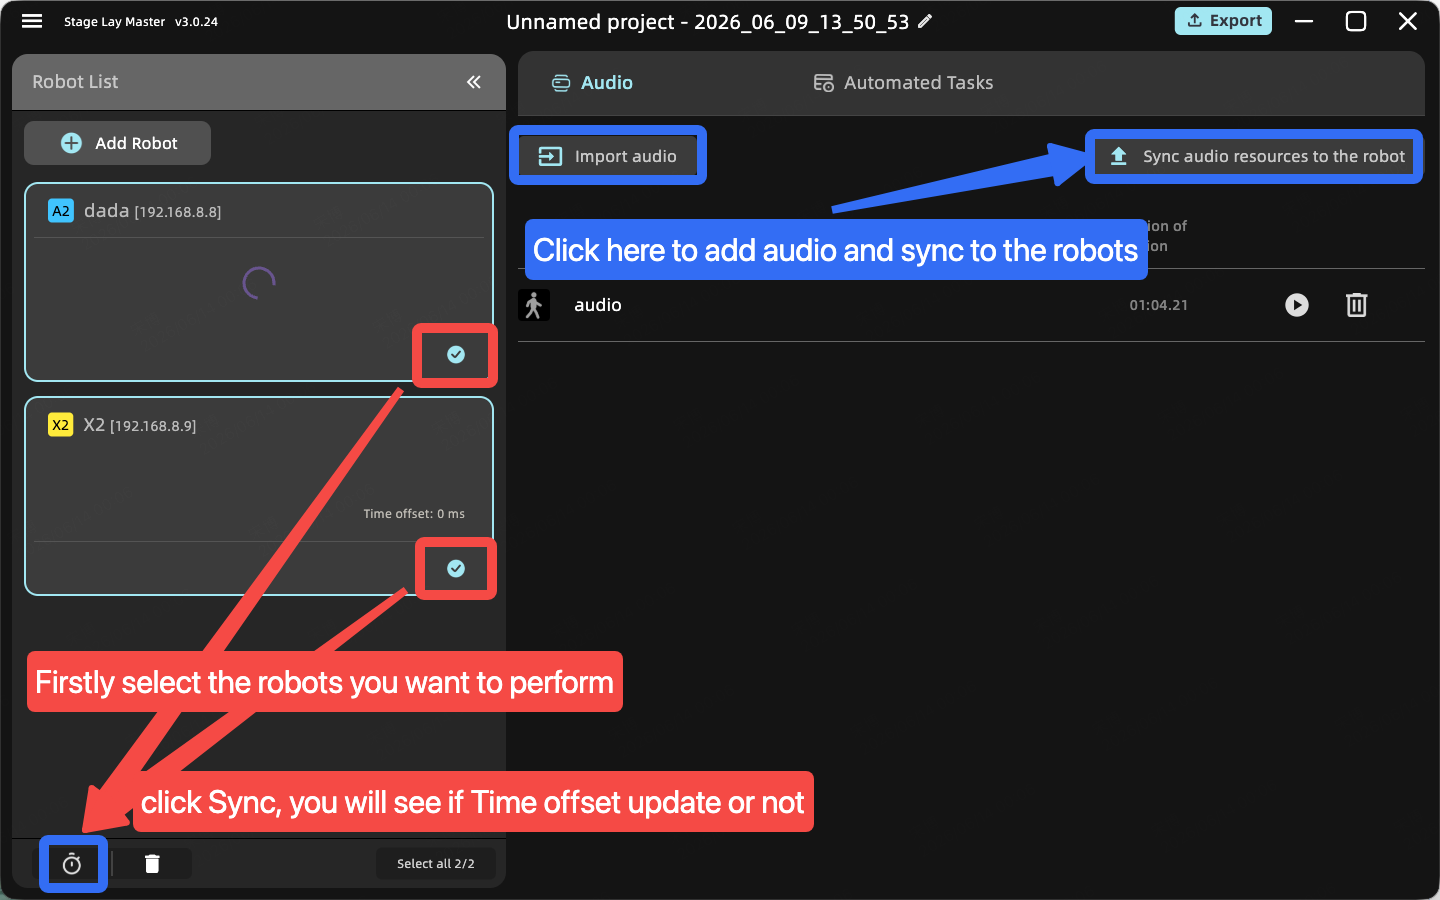
Click Sync — if the time offset refreshes, the robot has connected successfully.
Import audio files
Audio files are typically used as background music for robot group dance performances, and are played via an external speaker connected to the computer. You can find how to add audio in the screenshot above.
Start a group dance performance
The first step in creating a group dance task is to create the corresponding roles for each robot. You can find the +Add Roles button on the Automated Tasks tab.
Create a role
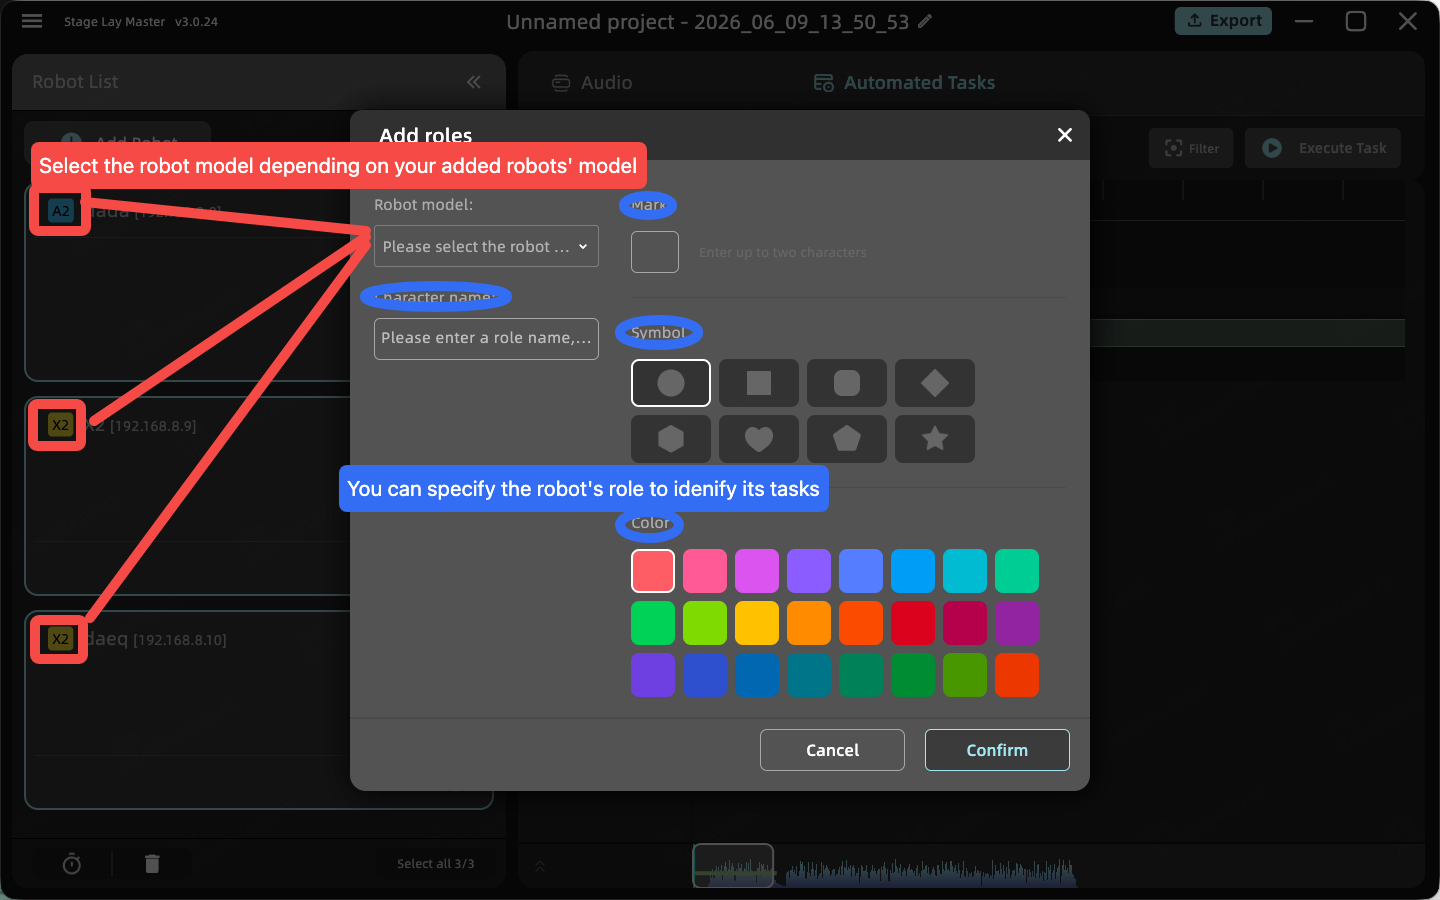
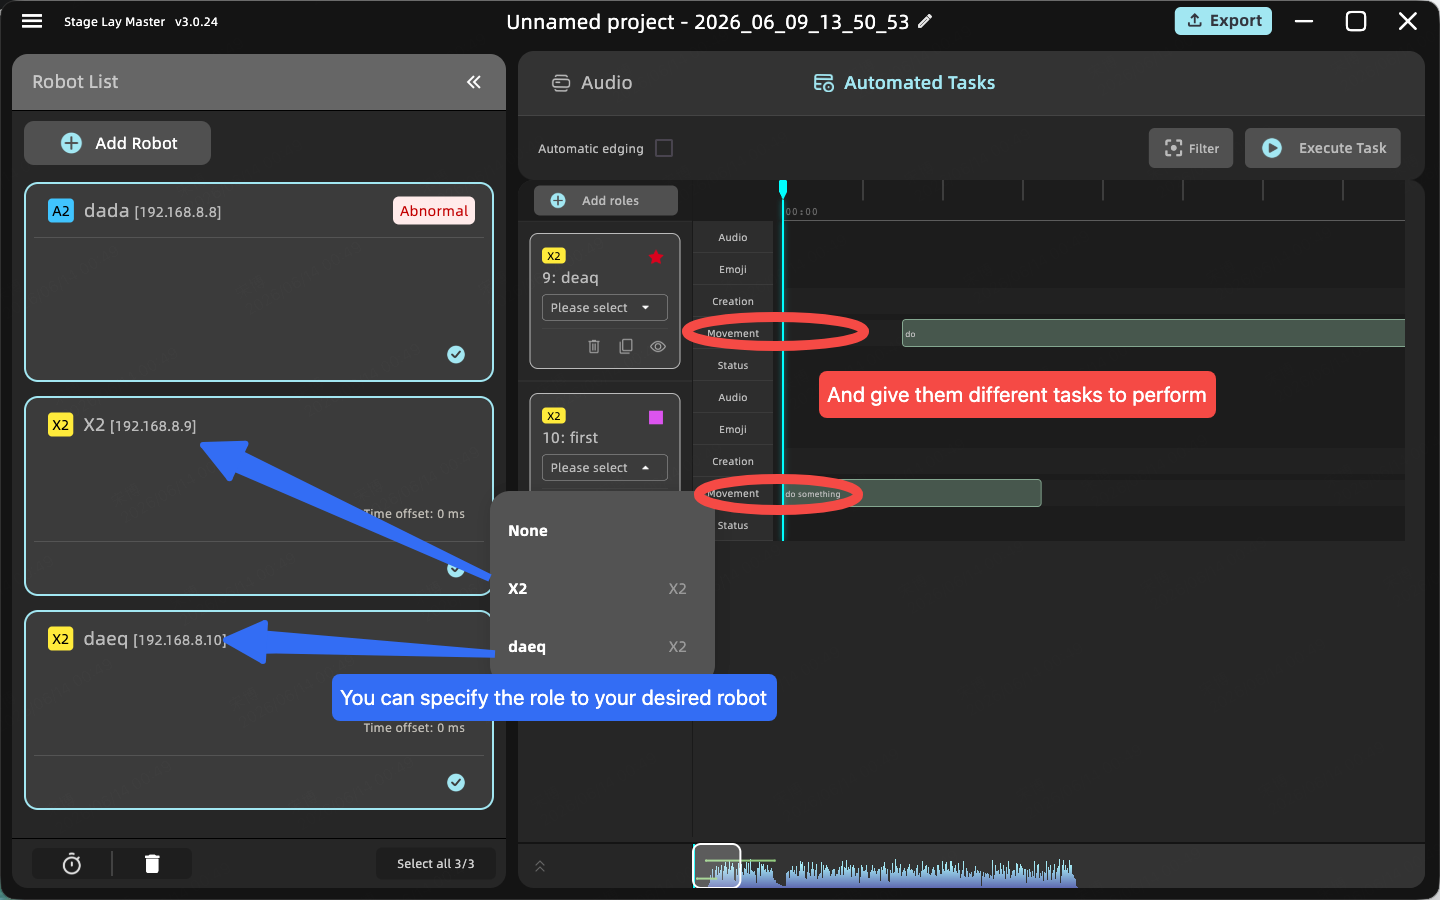
Specify the robots’ roles
Give your robot a task
On the left pannel, select only one robot, set the role to this robot, and right click on the Creation, you will find all available functions in this robot. The resources in each robot may differ, so if you want them to do the same task at the same time, don’t forget to varify each of them.
Right-click on the Creation timeline to create the desired action for the robot.
-
Action: The action resources are listed in the selected robot’s storage, meaning they must be pre-distributed through the LinkCraft Platform.
-
Duration: The duration of the individual action, unrelated to the overall length of the work.
-
Start time: When to trigger this action. Enter 0 to trigger it immediately.
Robot Version Differences
Due to differences between robot versions (Ultra / Youth), dance action files vary across devices. When orchestrating auto tasks, individually select each robot and choose the corresponding dance action.
Select your BGM (background music)
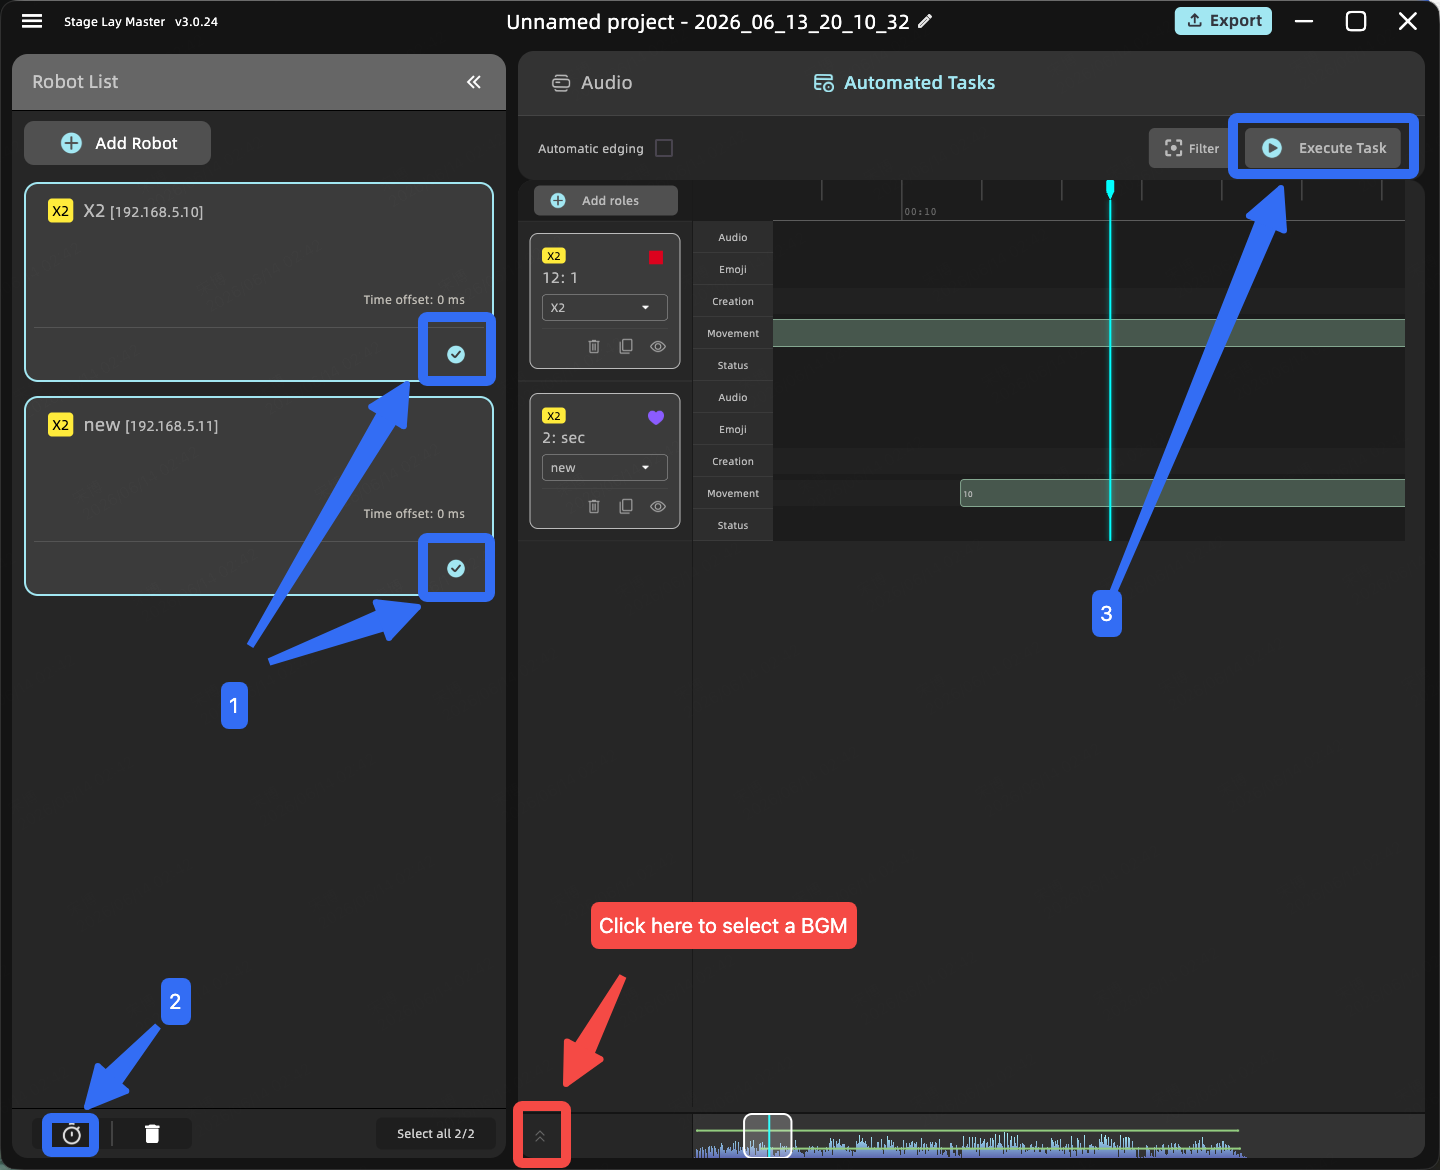
Refer to the red annotations in the screenshot below to select your imported audio.
You can also further edit the actions by right-clicking to edit, copy, or delete them. Use Batch adjustment (a positive number postpones a task; a negative number advances it) to keep the movements in time with the beat. Plan the show as you like.
Start the performance
As shown in the screenshot above, follow these steps:
- Select your actors.
- Sync your actors to confirm they are all connected.
- Execute the task and enjoy the show.
⚠️ Important — Space Clearance: Before distributing instructions, confirm that there is sufficient space between each robot.
Read Next
Tools
A3 Remote Control GUI