X2 Quick Start Guide
Recommended Reading
This guide is designed for setting up your X2 robot quickly. For detailed instructions, refer to the official site.
Startup from lie-face-up position (no lifting device required)
Step 1: Unbox and position the robot
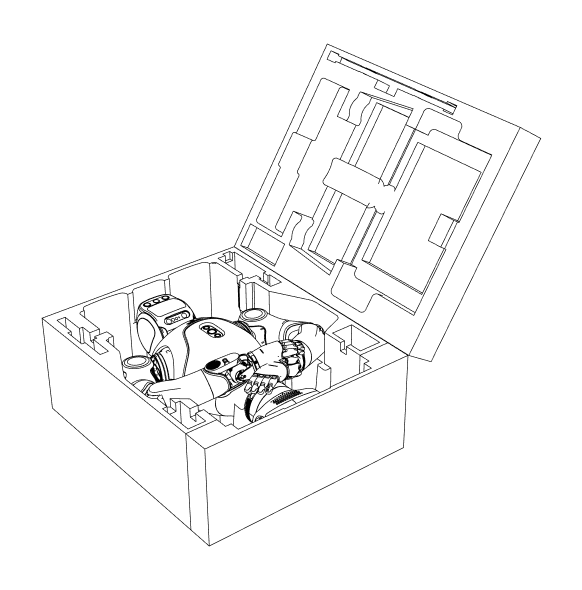
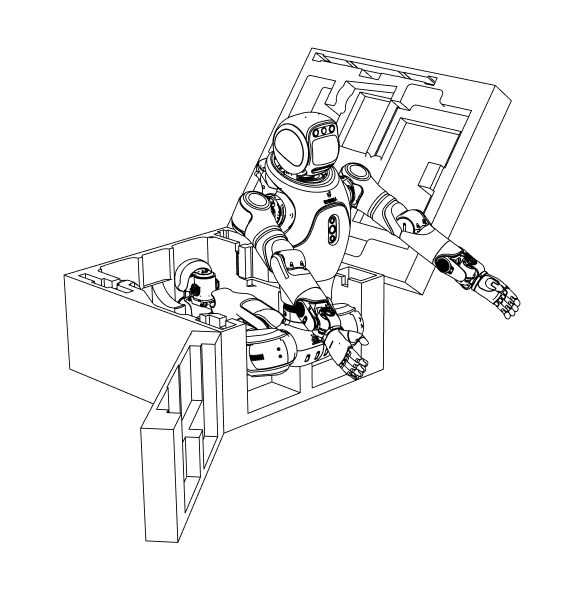
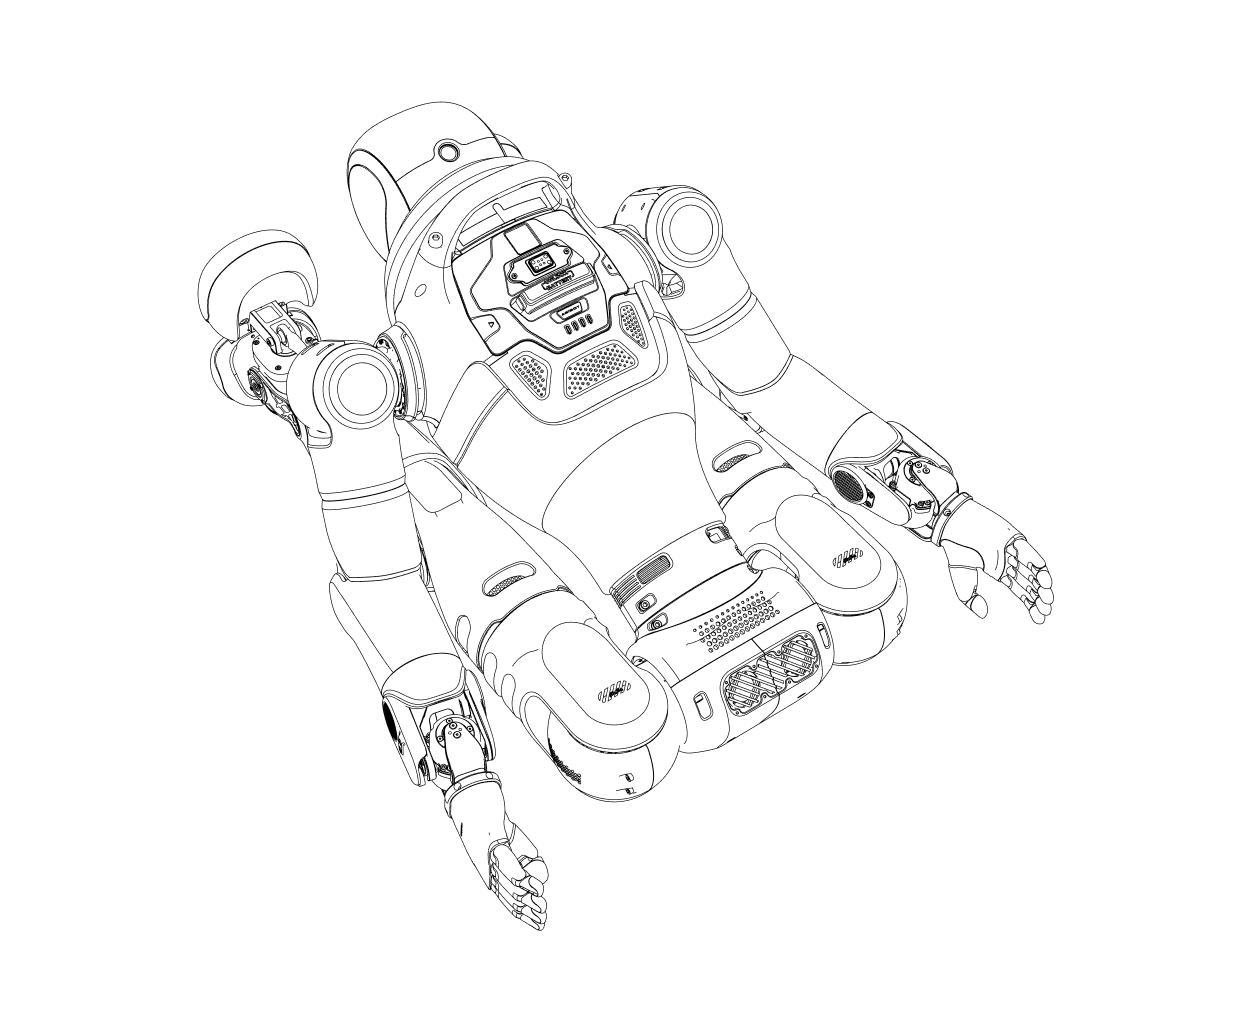
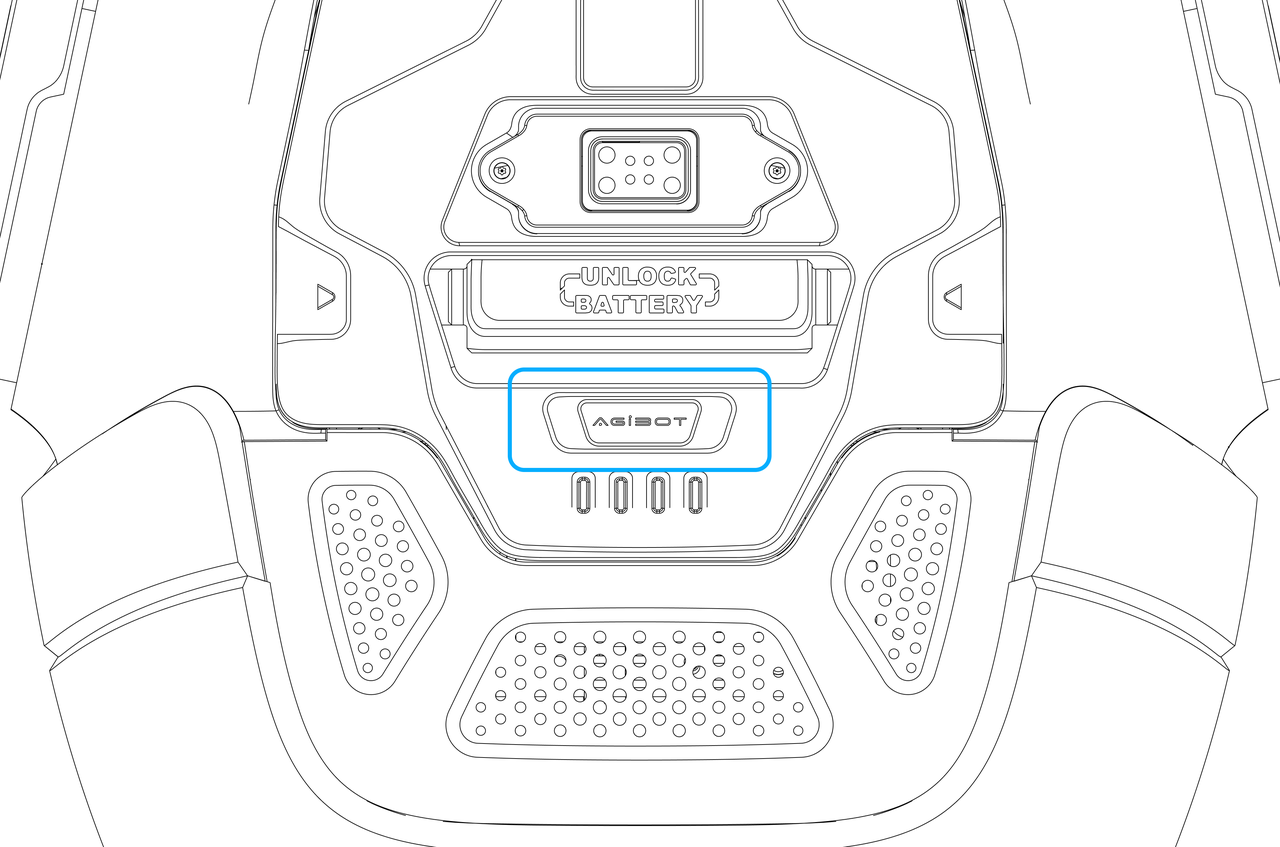
Remove the robot from the packaging as shown. Lift the robot slowly to avoid collisions during handling. Place the robot in the orientation shown below so that the battery status on the back of the robot can be checked or the battery can be installed.
Step 2: Install the battery
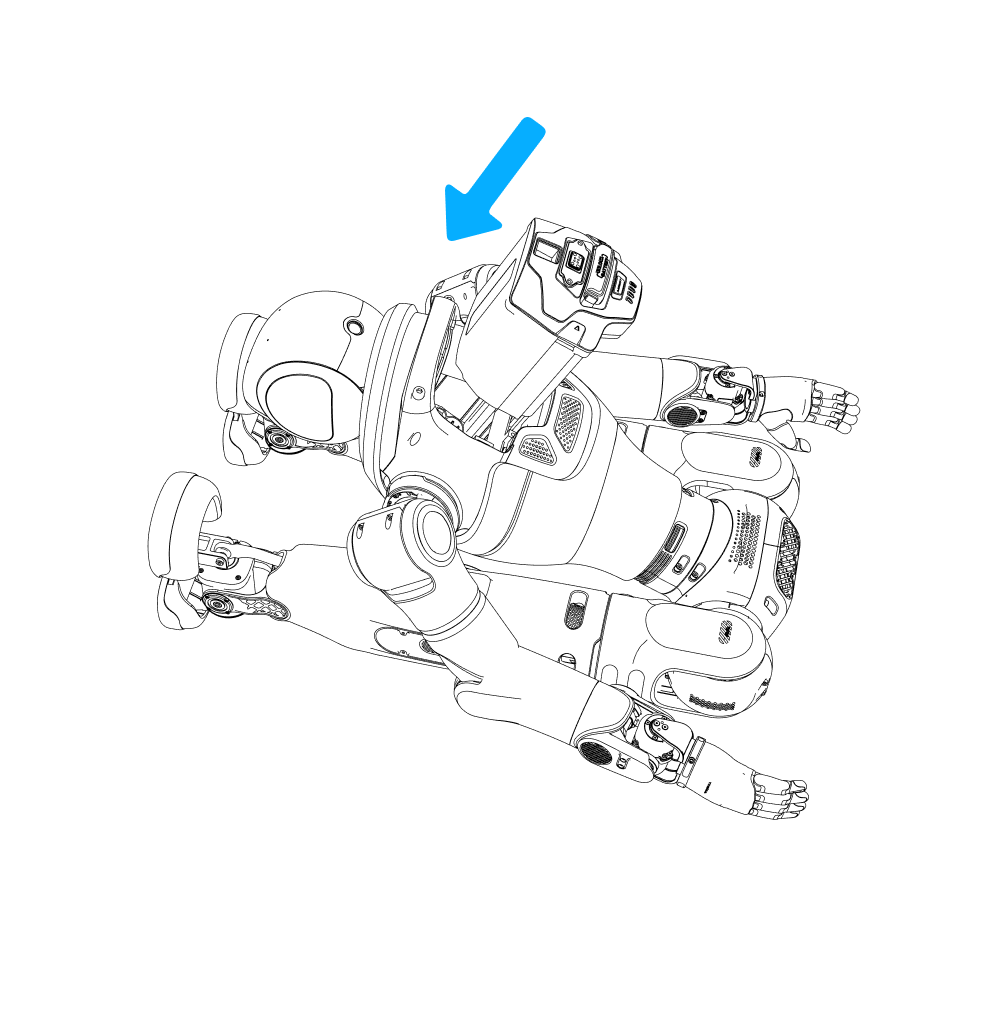
If the battery is not yet installed, insert it from the outside inward into the battery slot on the back of the robot. Push until you hear a “click” at the bottom — this indicates successful installation. After the click, press the battery once more to confirm it is fully seated.
Step 3: Power on
Before powering on, verify that the battery charge is greater than 2 bars (battery level > 50%). Short-press the power button on the back of the battery to wake the device, then long-press for 5 seconds to complete the power-on sequence. Once powered on, battery LEDs 1–4 will light up in sequence within 2 seconds (marquee animation).
Step 4: Position the robot face-up (lying flat)
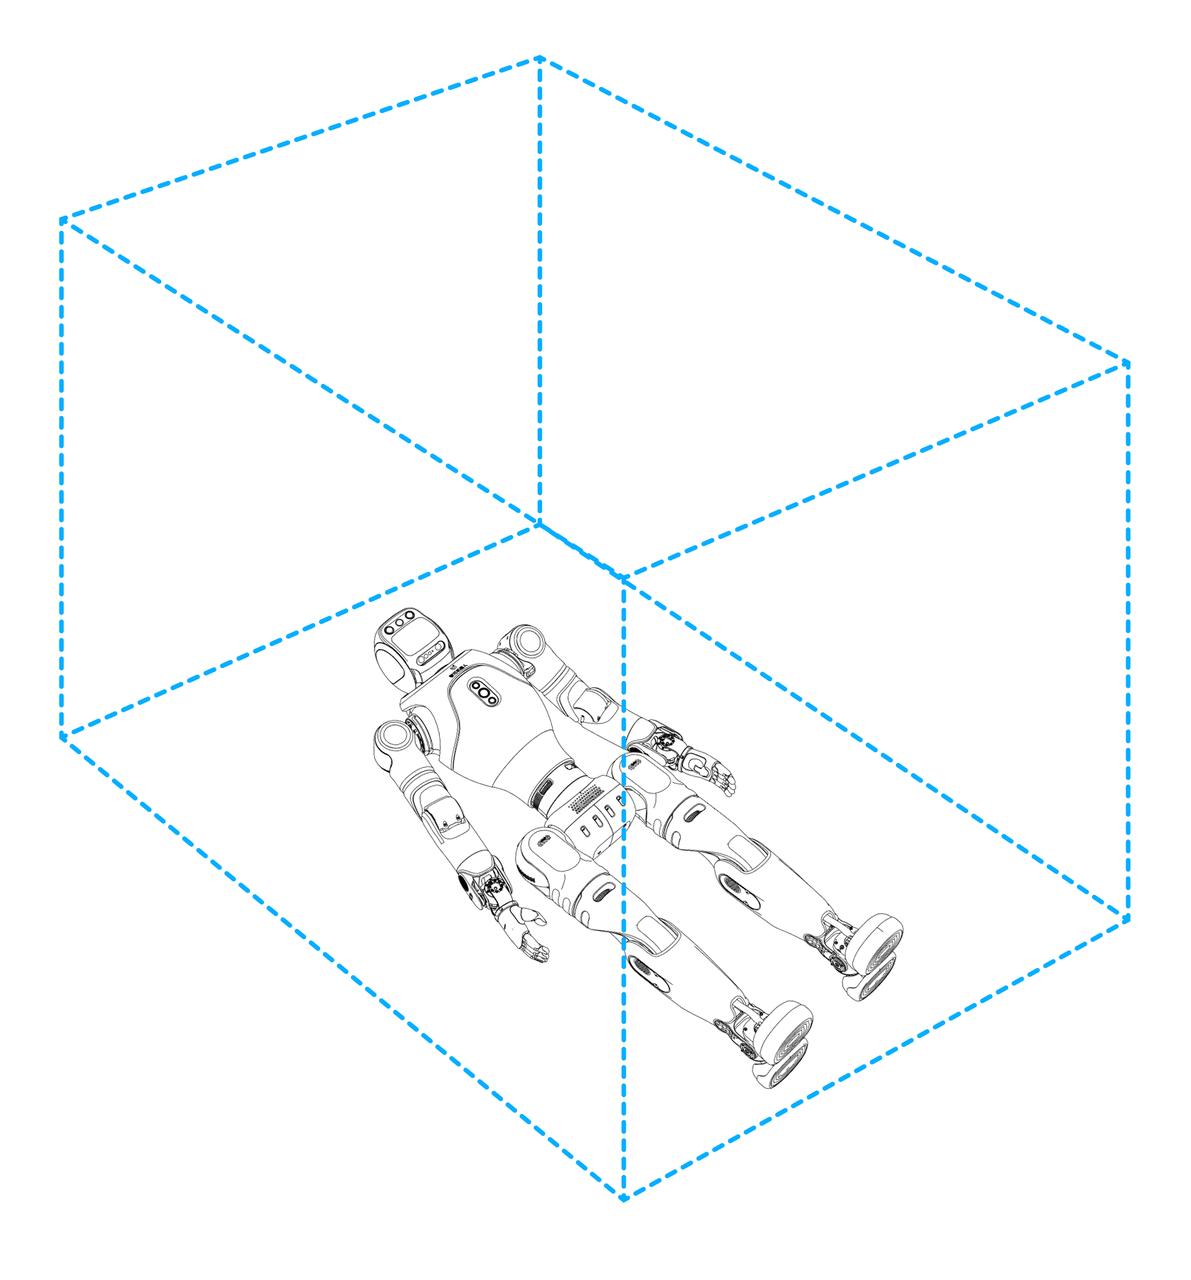
Place the robot in a face-up lying position as shown — legs and arms should be extended, with the robot’s front facing upward. The robot is now in zero-torque mode. Refer to the illustrations on the right to correctly position the head, legs, arms, chest, waist, and hip joints — in particular, ensure the hip joint’s front side is aligned with the robot’s overall forward direction. Before triggering the Lie-Face-Up startup action, ensure there are no objects within a 1-meter radius of the robot to provide sufficient safe clearance for the motion.
Step 5: Lie-face-up startup
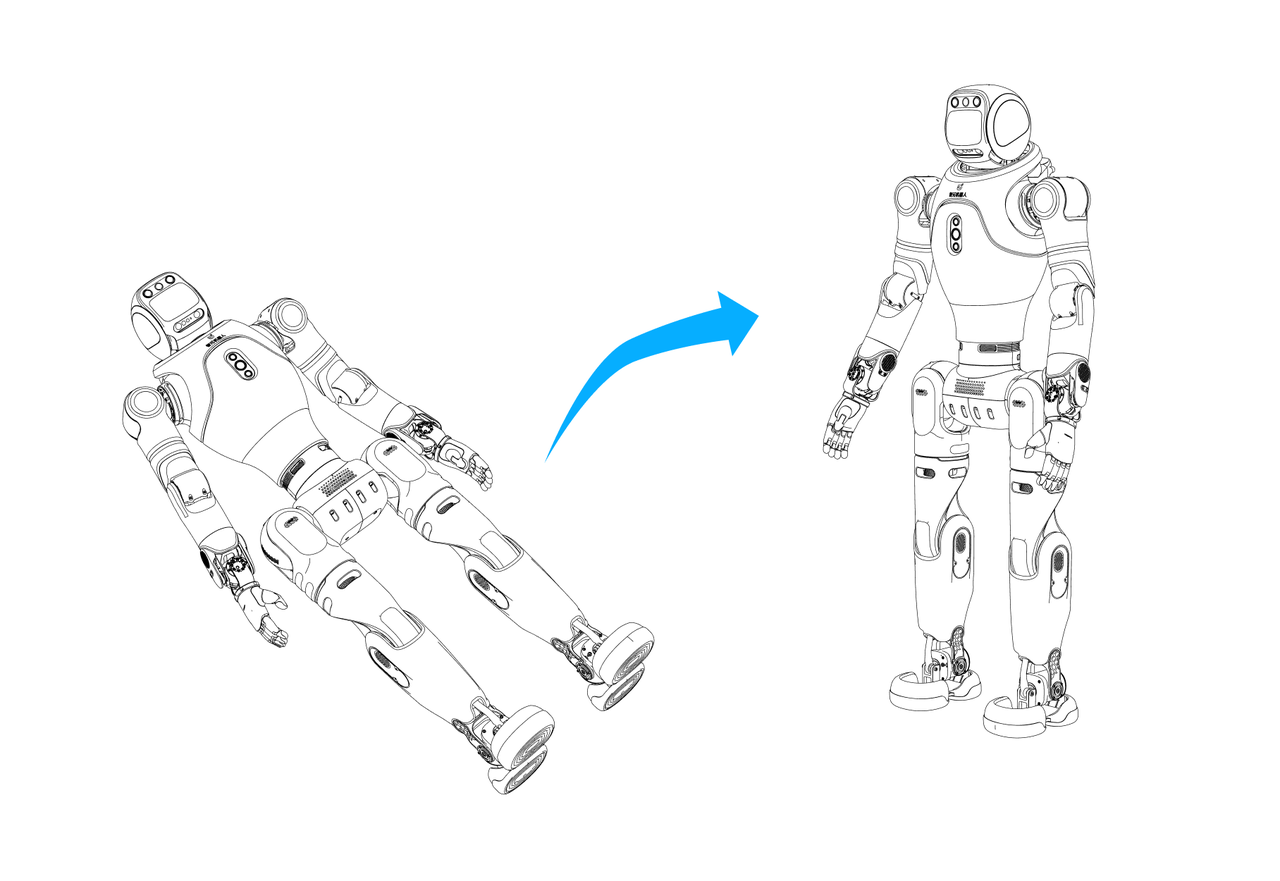
There are two methods you can use to have your robot stand up without assistance.
⚠️ Note: Universal Startup Prerequisites (all methods):
-
Battery level must be > 2 bars (> 50%) before power-on.
-
After power-on, wait approximately 1 minute for system initialization before any operation.
-
Ensure the ground is flat, hard, and free of slopes, steps, or unfixed carpet.
-
Ensure a clear radius of at least 1 meter around the robot before executing any motion.
-
Do not perform lie-face-up or lie-face-down startup when an OmniHand or gripper is installed as the end effector.
-
Using the remote controller, simultaneously short-press the 【↑ + △】 buttons. The robot will rise from the face-up lying position and enter the Stable Standing state.
Step 6: Enter walk/run mode
Once in Stable Standing mode, the robot supports “push the stick to walk”:
-
Push the left stick up/down/left/right to control the robot’s walking direction.
-
Push the right stick left/right to rotate the robot in place.
Start with Agibot Go
The Agibot Go app is the companion mobile application for the Lingxi X2 robot. It enables full lifecycle robot management, including network setup, motion control, OTA updates, exhibition tours, and more.
Download link:
⚠️ The latest app version corresponds to the robot’s latest firmware version. Download the correct version to ensure compatibility.
Select server
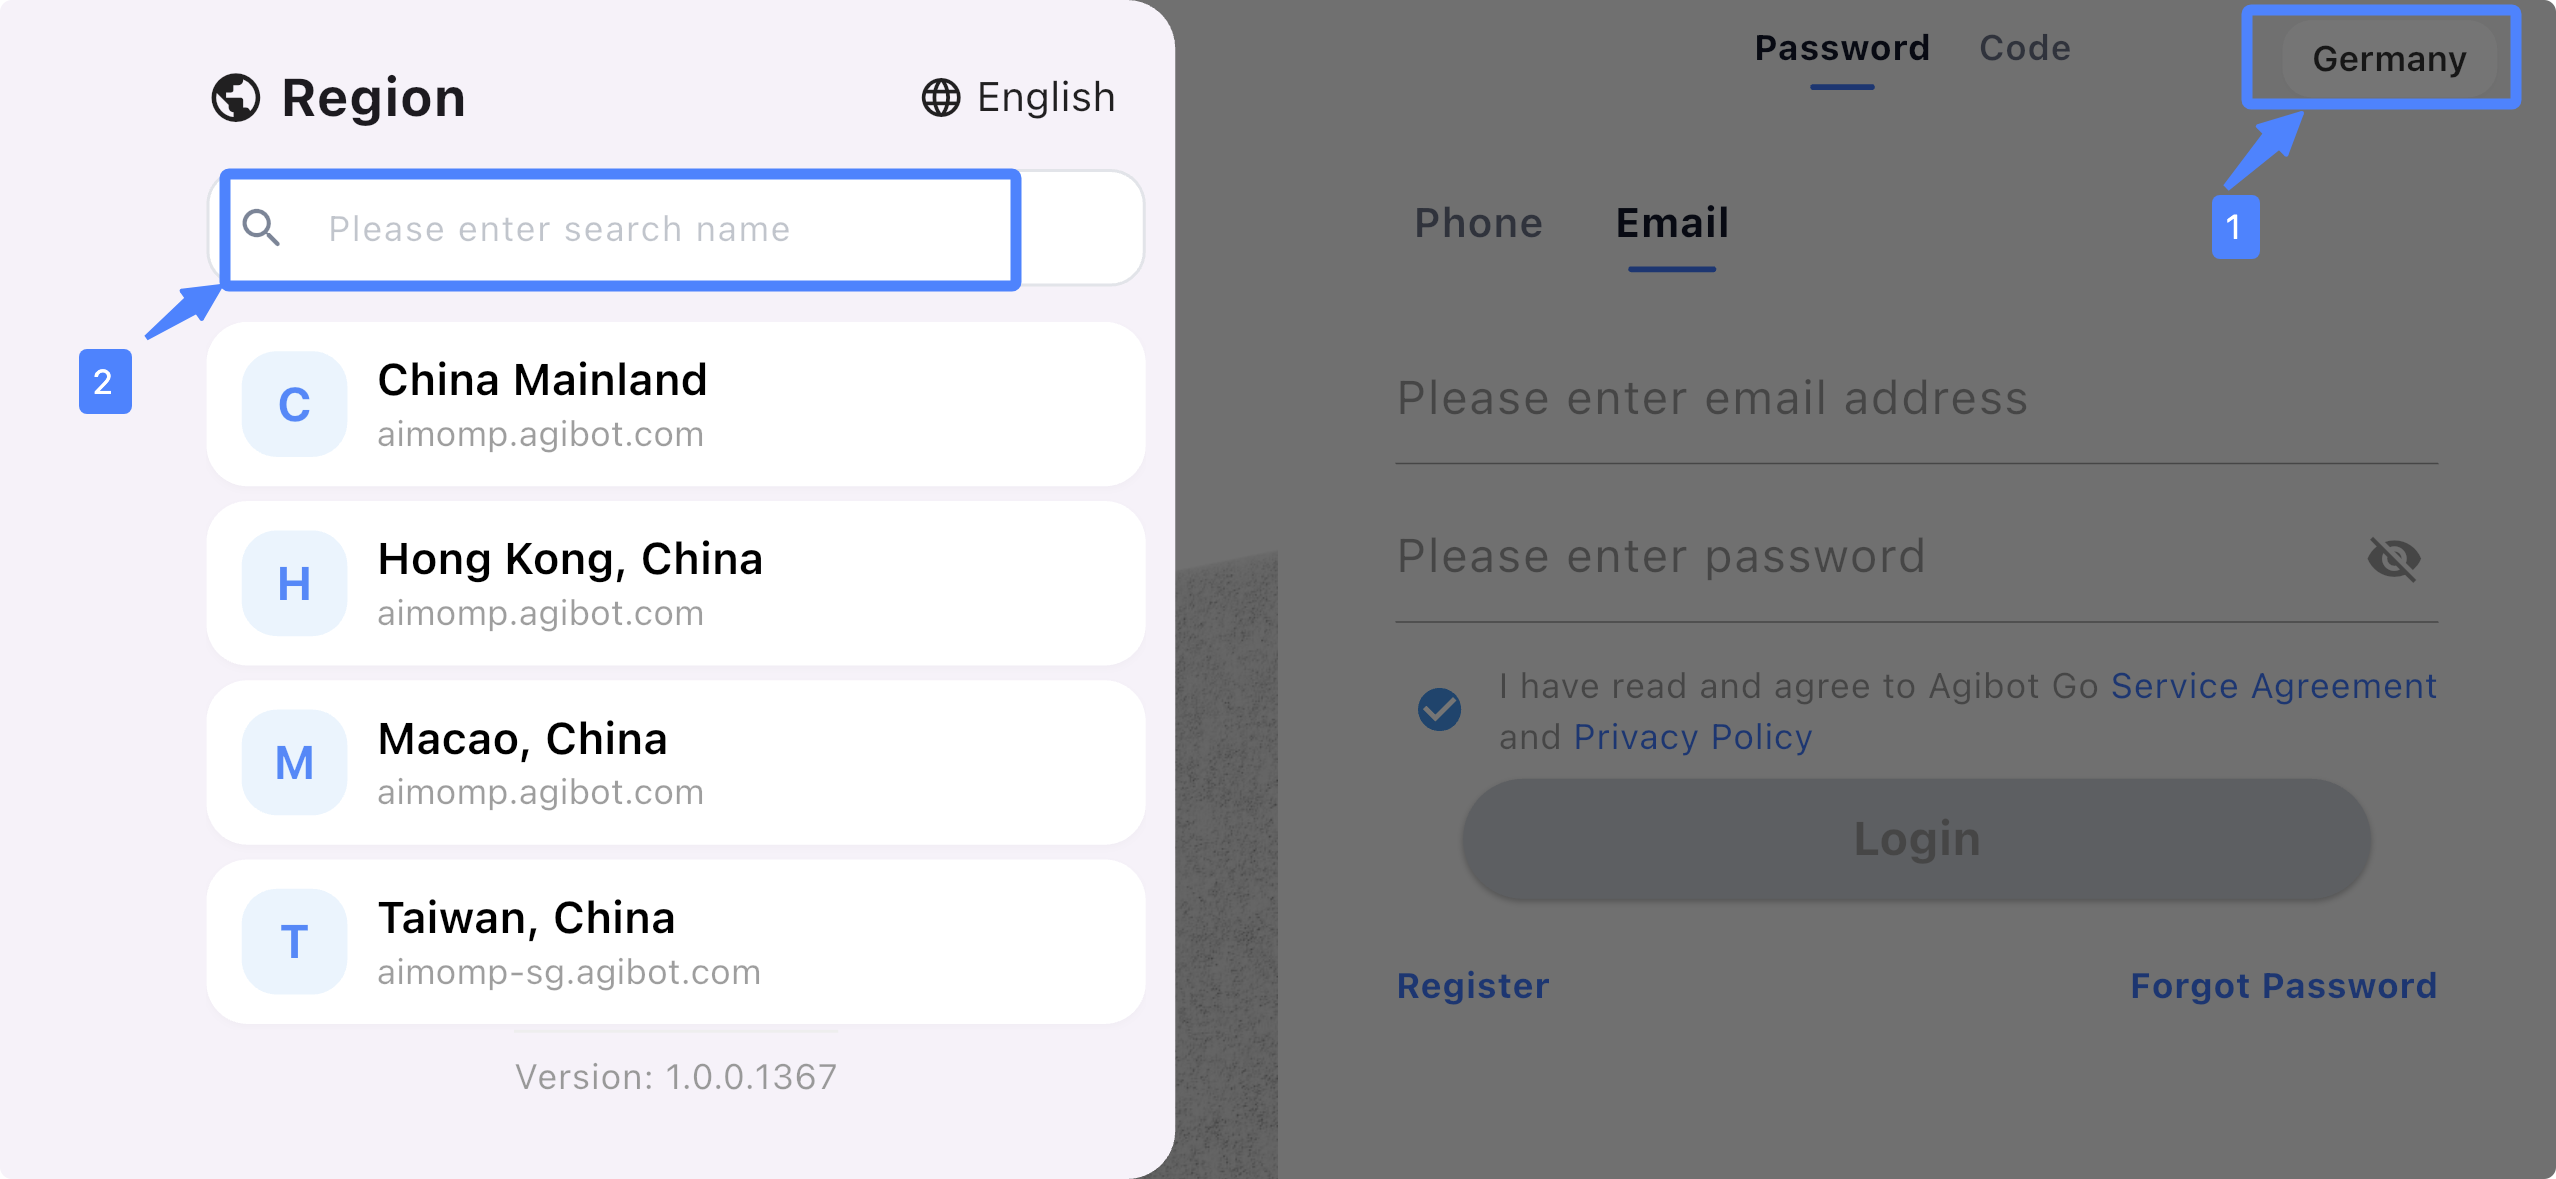
When the robot’s configured site does not match its actual physical location, you can switch the robot’s cloud server OMP environment (site) via the Agibot Go app for better performance.
Before logging in, select the app environment first — this determines both the robot’s OMP and Interaction Cloud environments.
Organization selection
If you are adding your first robot, you can skip this section and go directly to Robot Connection. You can use Organization to manage your robots and collaborate with your colleagues.
Organization Mode Overview
- Robots are managed at the Organization level.
- One organization can contain multiple user accounts and multiple robots.
- All members within the organization can share and use the robots under that organization without needing individual bindings.
Organization Permission Levels
-
Organizations have three roles: Owner, Admin, and Member.
-
Owner has the highest permissions: can invite members, remove members, assign or remove Admins, view the organization device list, add devices, and remove devices.
-
Admin has permissions below Owner: can invite or remove members, and view the organization device list.
-
Member has usage-only access: can view the organization device list.
Historical Data Migration
-
To ensure your access rights are not affected, the system will automatically migrate your historical data.
-
For each robot you have previously bound, the system will automatically create a dedicated organization. All accounts that were ever bound to that robot will be automatically added to the corresponding dedicated organization.
-
After migration, your robot access rights and operation permissions remain exactly the same as in the legacy version — no additional action is needed.
Notes After Historical Data Migration
-
After the upgrade, you may notice that your account has been automatically added to an organization. This is a normal result of the data migration and does not indicate any permission anomaly.
-
If you need to add robots, add or remove organization members, merge multiple organizations, or adjust organization permissions, please contact a Zhiyuan sales representative for backend configuration. Before adjustments are made, resources within the organization remain fully usable, but the app does not yet support self-service modifications to organization information, members, or robot binding relationships.
Robot connection
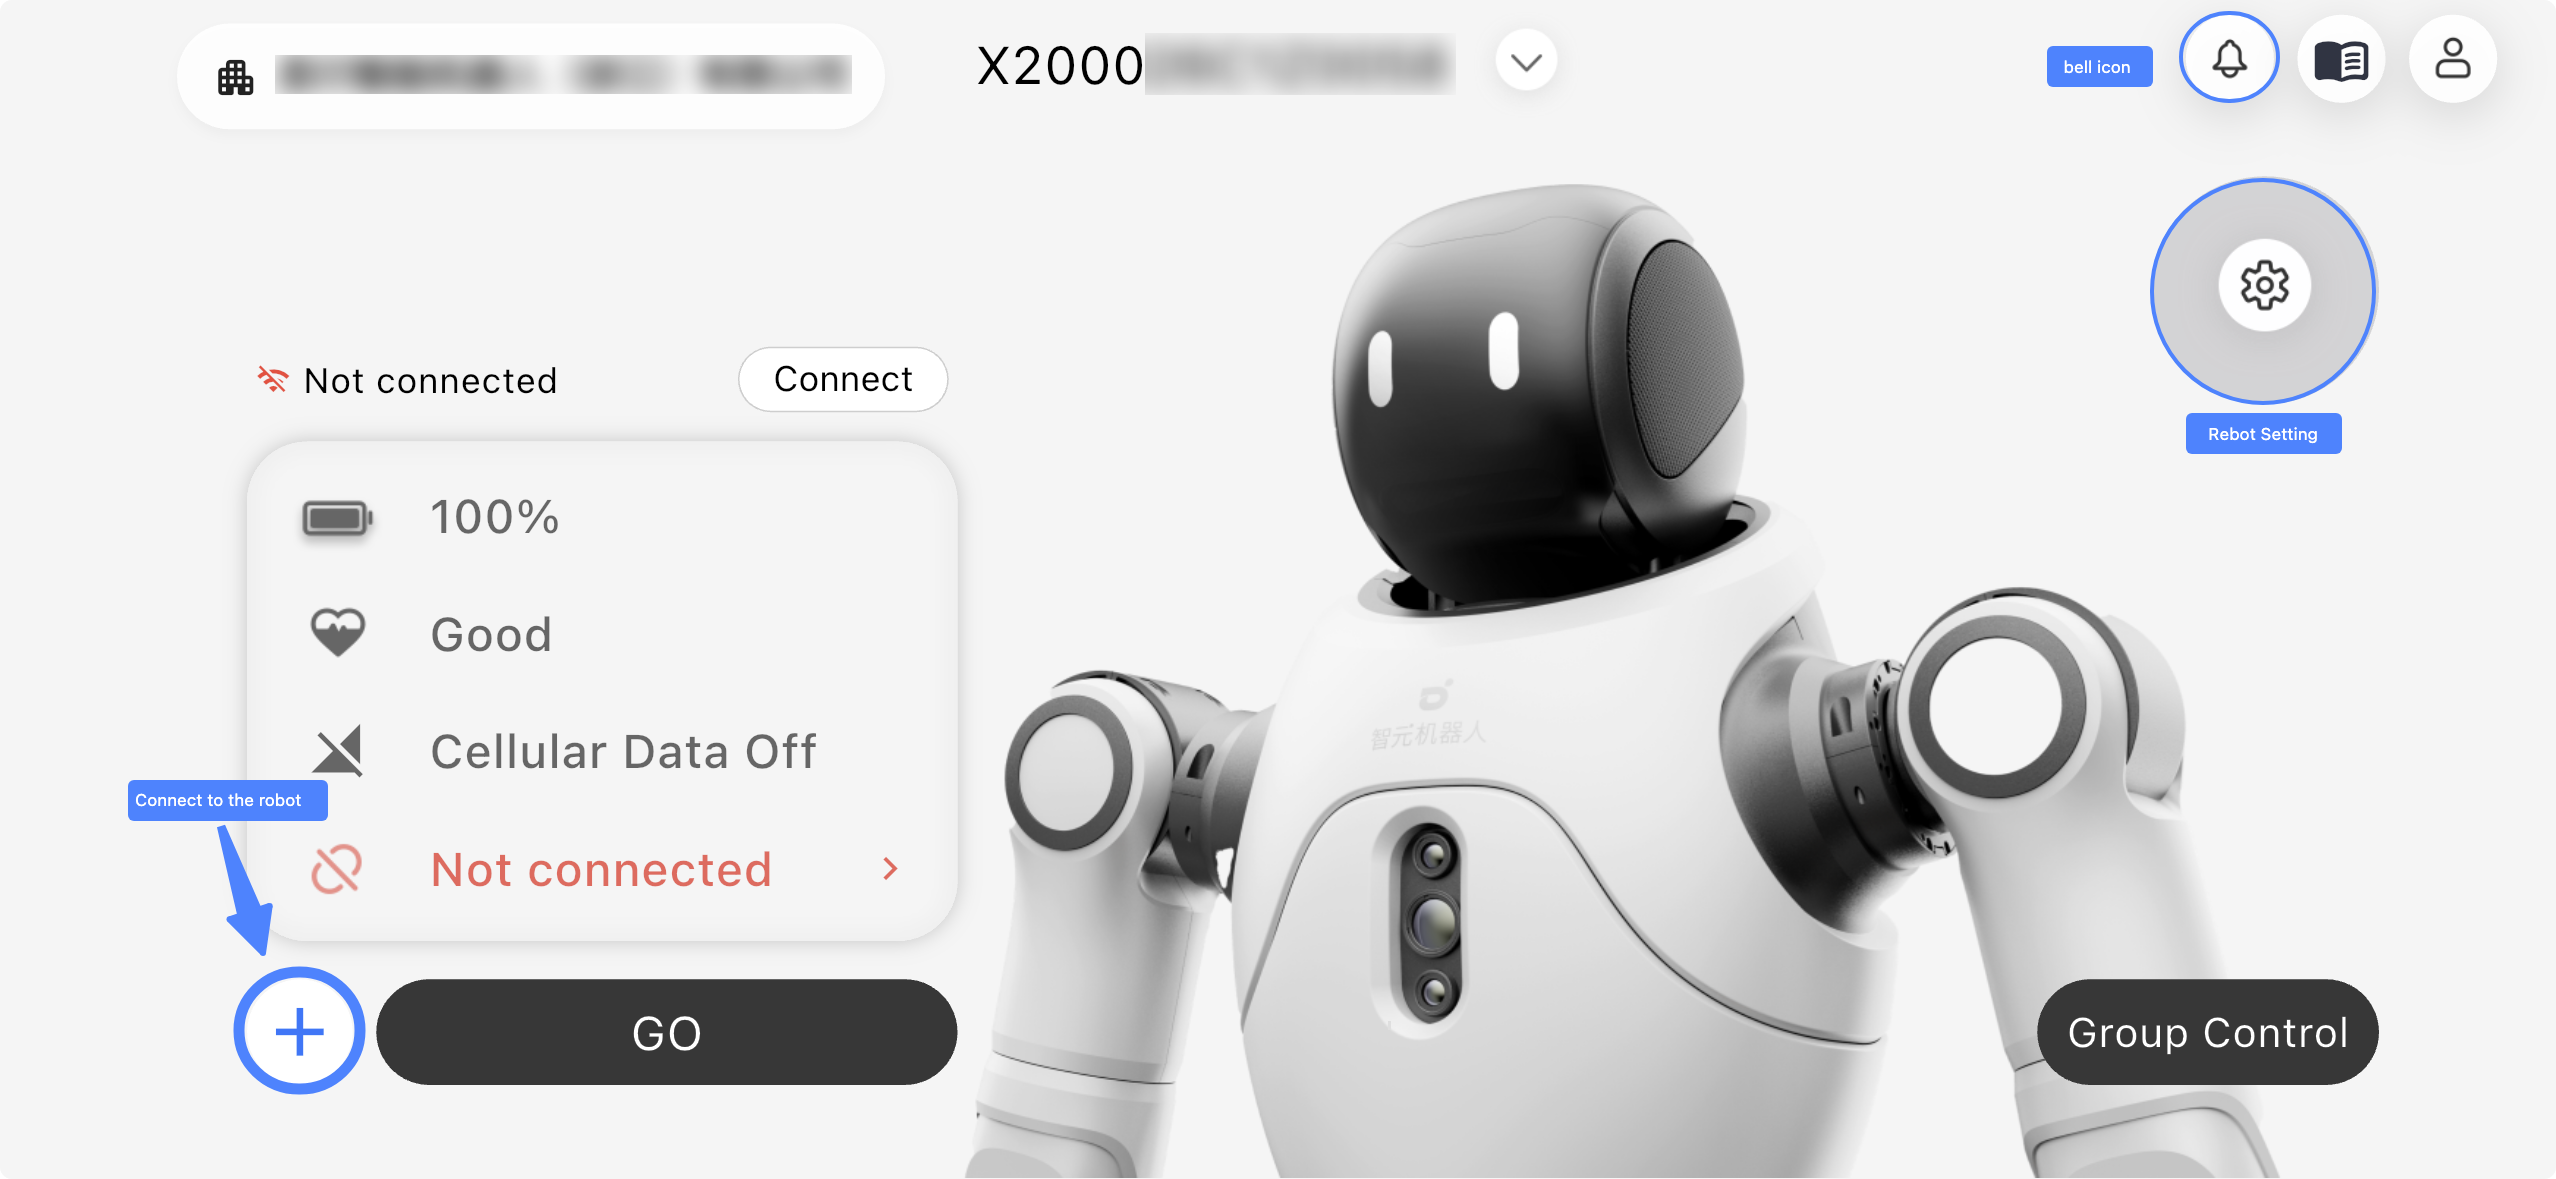
| Step | Interface |
|---|---|
| Add Robot | 1. Open the Add Robot interface. 2. Add a robot. |
| Connect via Wi-Fi | 1. Tap Wi-Fi connection. 2. Enter the Wi-Fi password. |
| Connect via AP Hotspot | 1. Tap AP Hotspot connection. 2. Select and connect. |
| Connection Result Notification | 1. Connection successful. 2. Normal interaction available. |
| Add Additional Robot | 1. Tap + button on the bottom left. 2. Add a robot. |
⚠️ What if the robot is bound?
See this page for several solutions.
Sync interaction cloud environment
Depending on your robot firmware version (learn how to find your firmware version), you can find the methods to sync your robot’s Interaction Cloud environment below:
v1.0.0 or higher
After logging in, there are two ways to sync the Interaction Cloud environment to the selected app environment:
1: Tap the bell icon → “Sync Robot Region”
2: Tap Settings → General → Region → “Sync Robot Region”
If no sync prompt appears, it means the robot’s current OMP and Interaction Cloud environments are already consistent with the logged-in app environment.
For Agibot Go Ex
-
Tap Settings → General → Robot cloud server → select your Region
-
Tap Settings → Interaction settings → Interaction cloud site
After tapping Sync, reboot the robot for changes to take effect.
v0.9.0
After logging in, tap Settings → General → Robot cloud server → select your Region.
Then reboot the robot and use Agibot Go to connect to your robot. The OMP Server should be updated behind the icon  .
.
Command Line method
Use this method only if you are experienced:Connect to your robot using an Ethernet cable.
X2 Ultra: ssh agi@10.0.1.40
X2 Youth: ssh agi@10.0.200.40
Edit:
vim /agibot/info/omp_serverEnter one of the following:
- North America Server:
emax-us-east.agibot.com - Europe Server:
emax-eu.agibot.com - Singapore Server:
emqx-sg.agibot.com
Save and reboot your robot, then wait at least one minute to check whether it is online.
Stand with Agibot Go
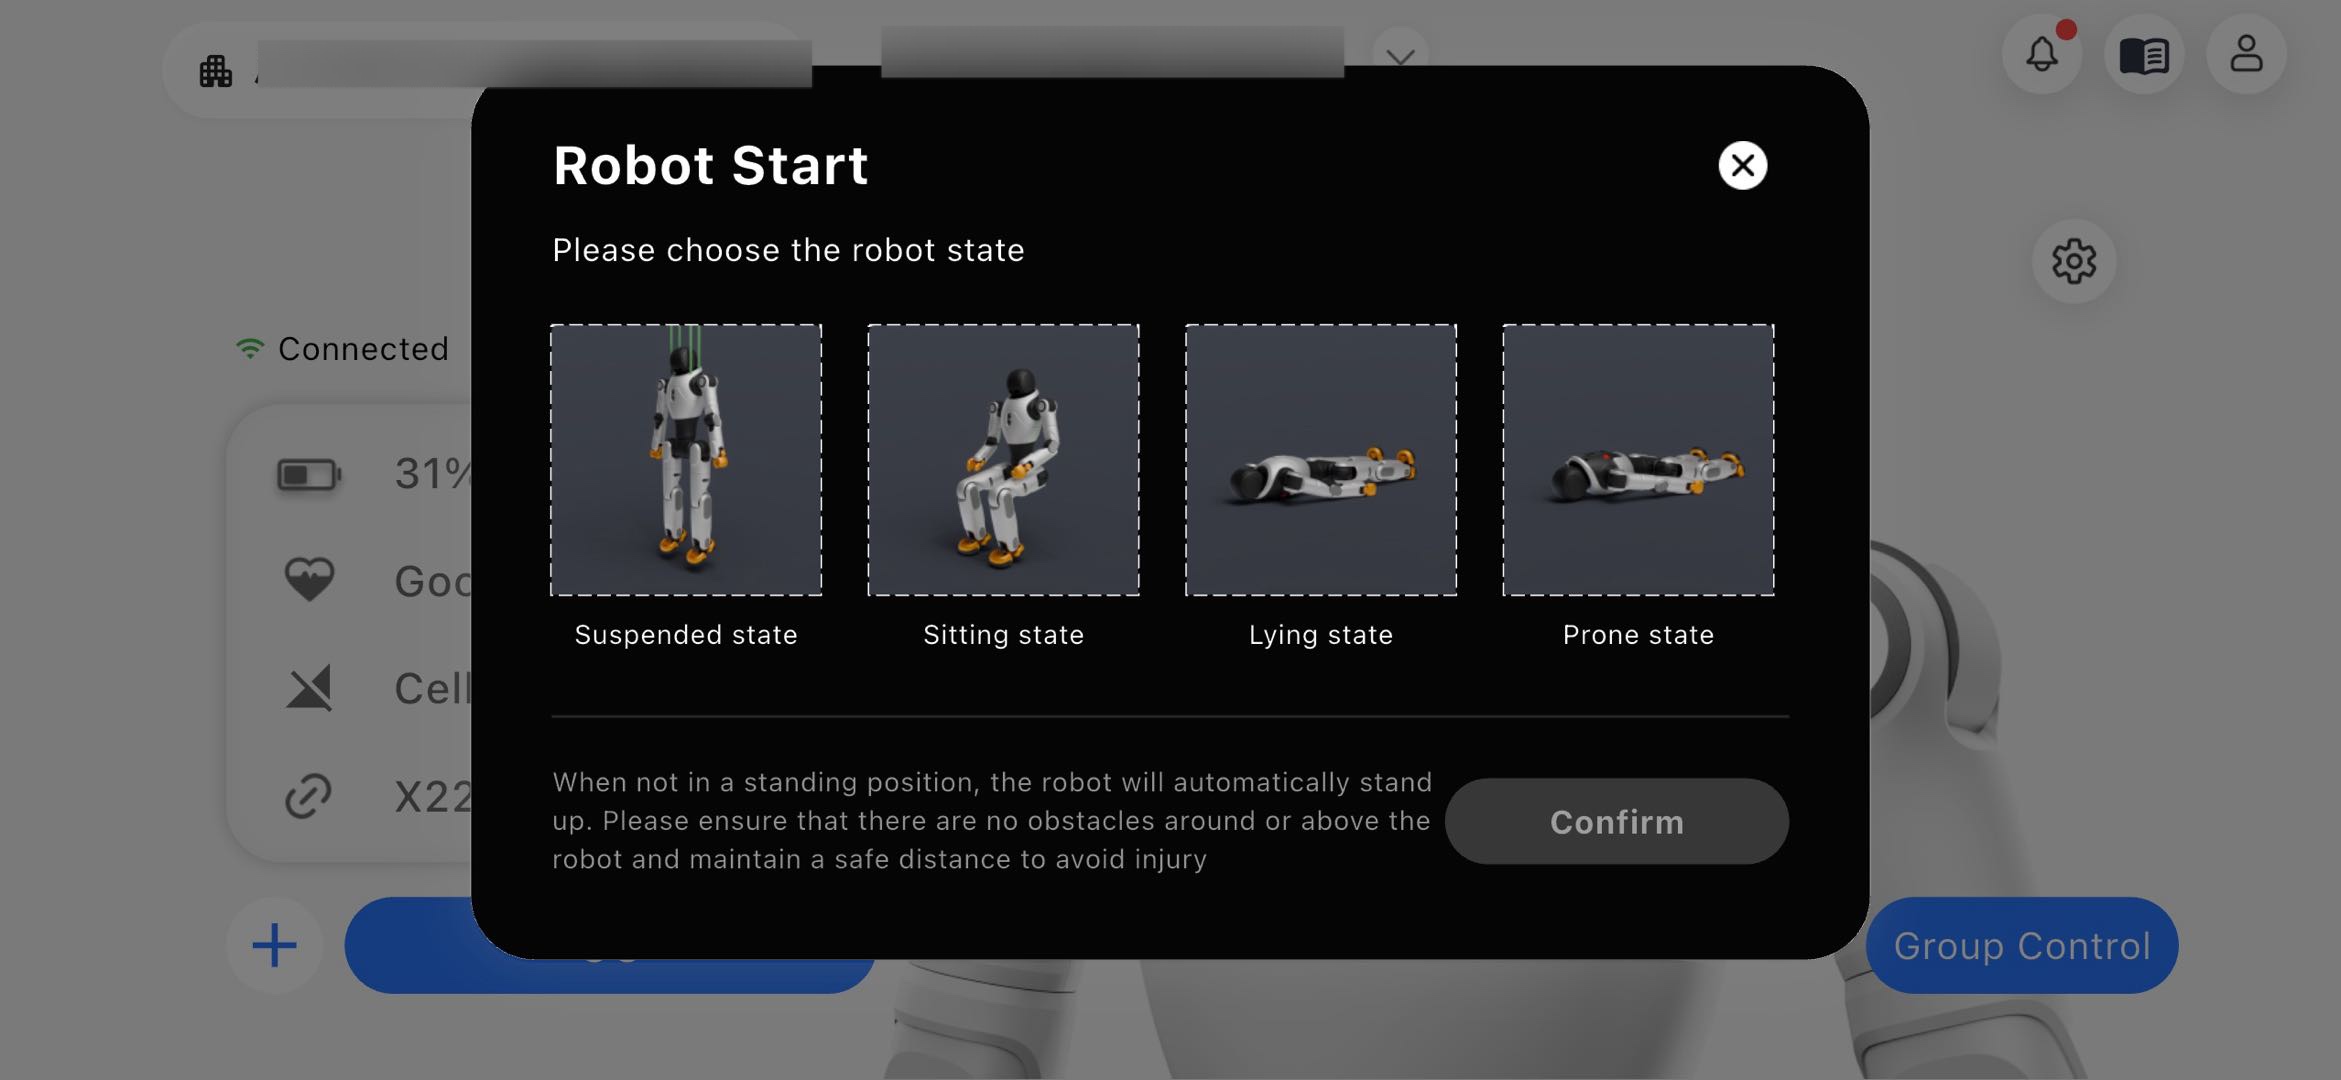
- Select the correct method to start. The robot should currently be in the Lying state.
-
Make sure you have fully read the startup prerequisites, then tap to confirm (double-check).
-
The robot will switch into Stable Standing mode.
Congratulations — your robot is now standing. Read on to familiarize yourself with the interface.